Taking Self-Portraits and Group Photos with Shutter+
By Ian Middleton · Travel & landscape photographer
Taking Self-Portraits and Group Photos with Shutter+
Shutter+ gives you everything you need to photograph yourself — whether that’s a quick selfie with your mirrorless camera, a family group shot, or placing yourself inside a landscape scene. This guide covers the four key features to use and how to combine them.
1. Use Live View to Frame the Shot from Inside the Scene
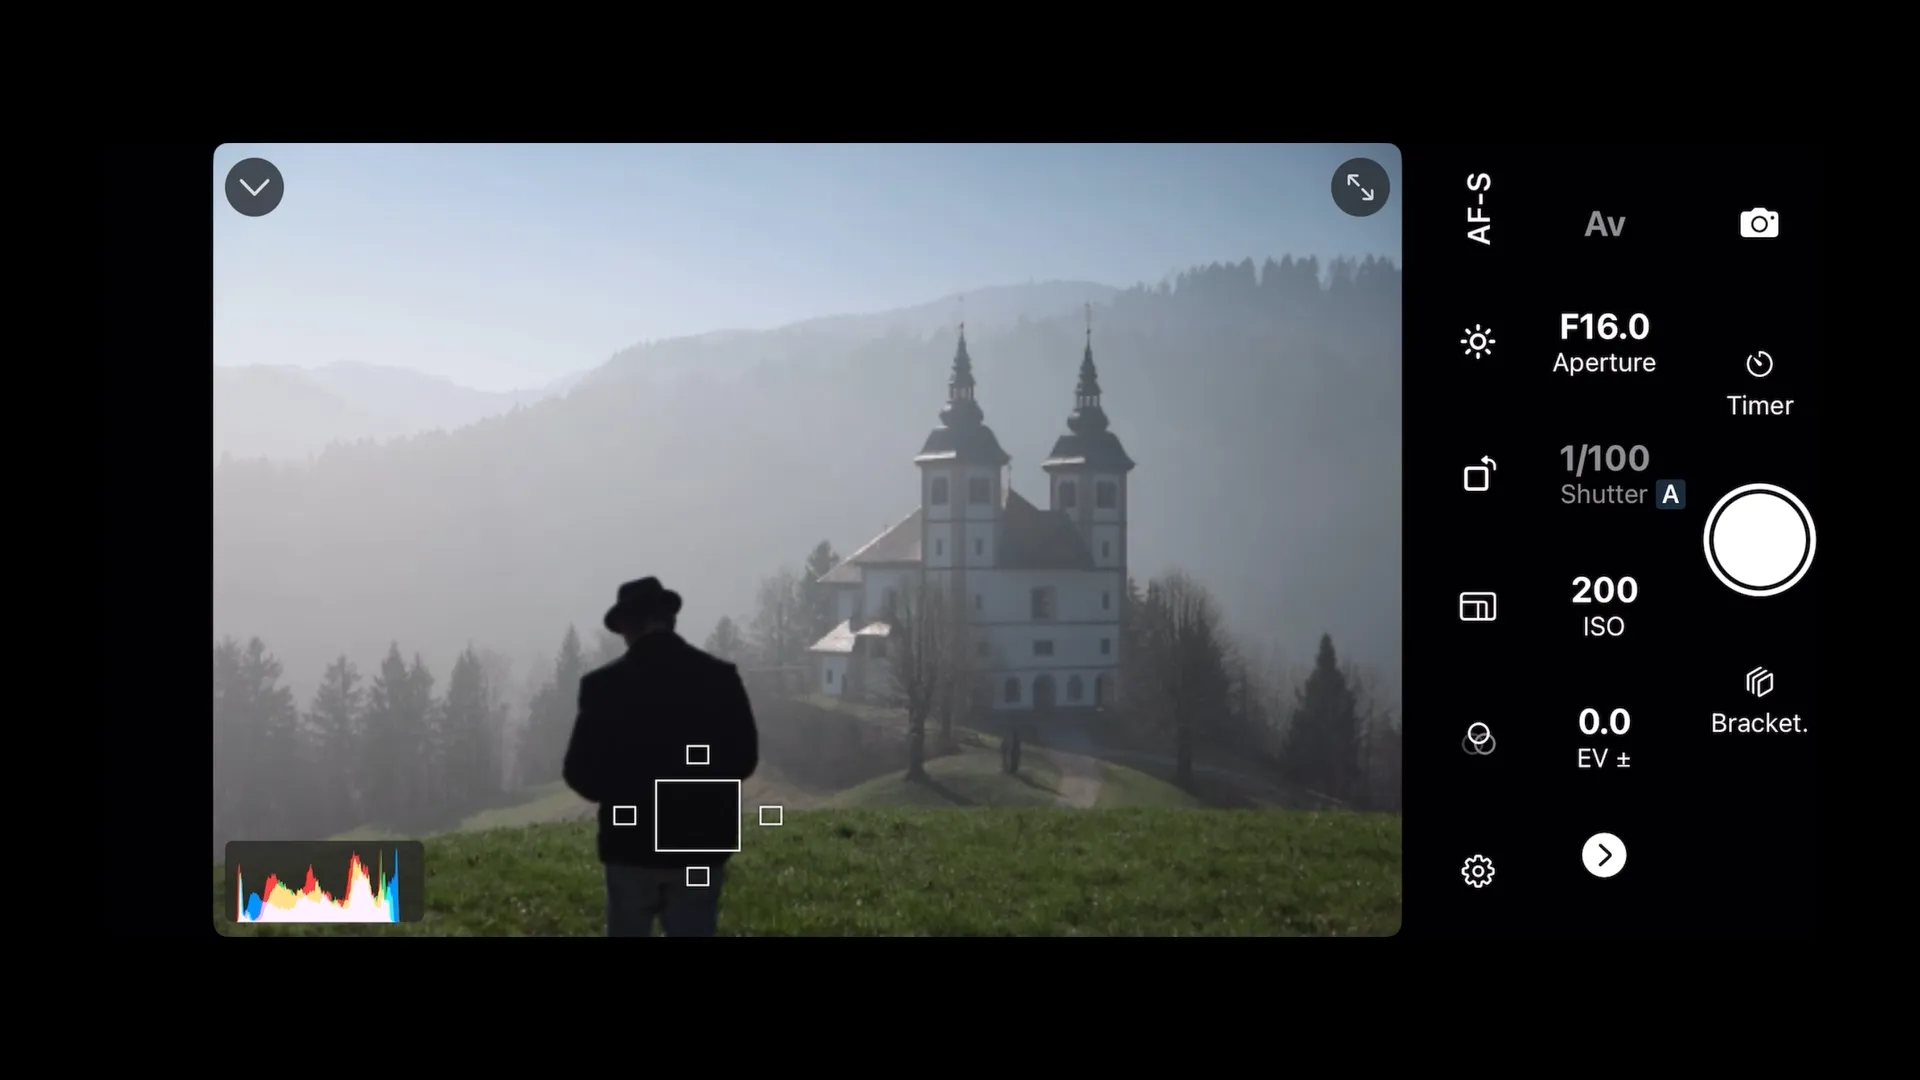
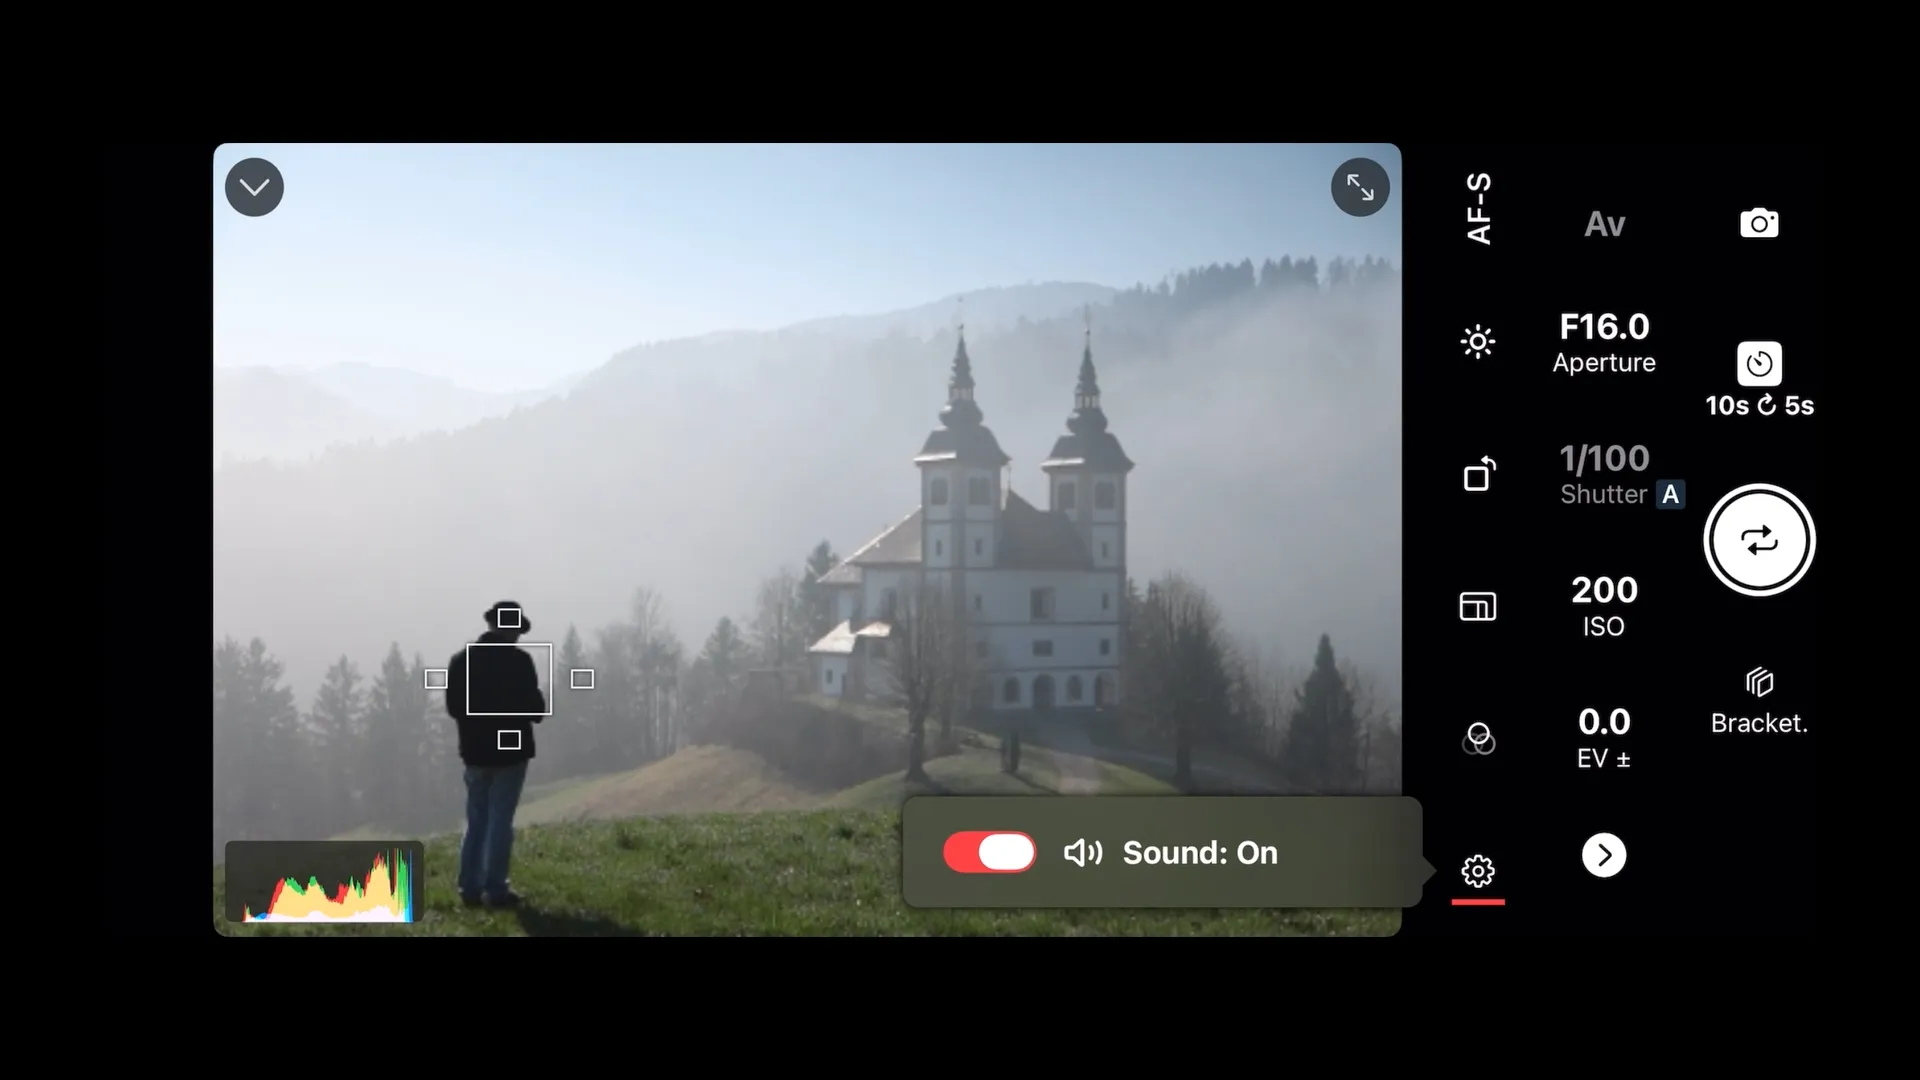
Once connected, Shutter+ streams a live view from your camera to your iPhone. Walk to where you intend to stand, look back at your iPhone, and adjust your position until the composition is exactly right. You can see in real time whether you’re centred, too close to the edge, or obscured by something in the foreground.
This removes the guesswork that comes with using the camera’s built-in self-timer alone, where you have no way of checking framing without returning to the camera after every attempt.
2. Tap to Focus on Yourself
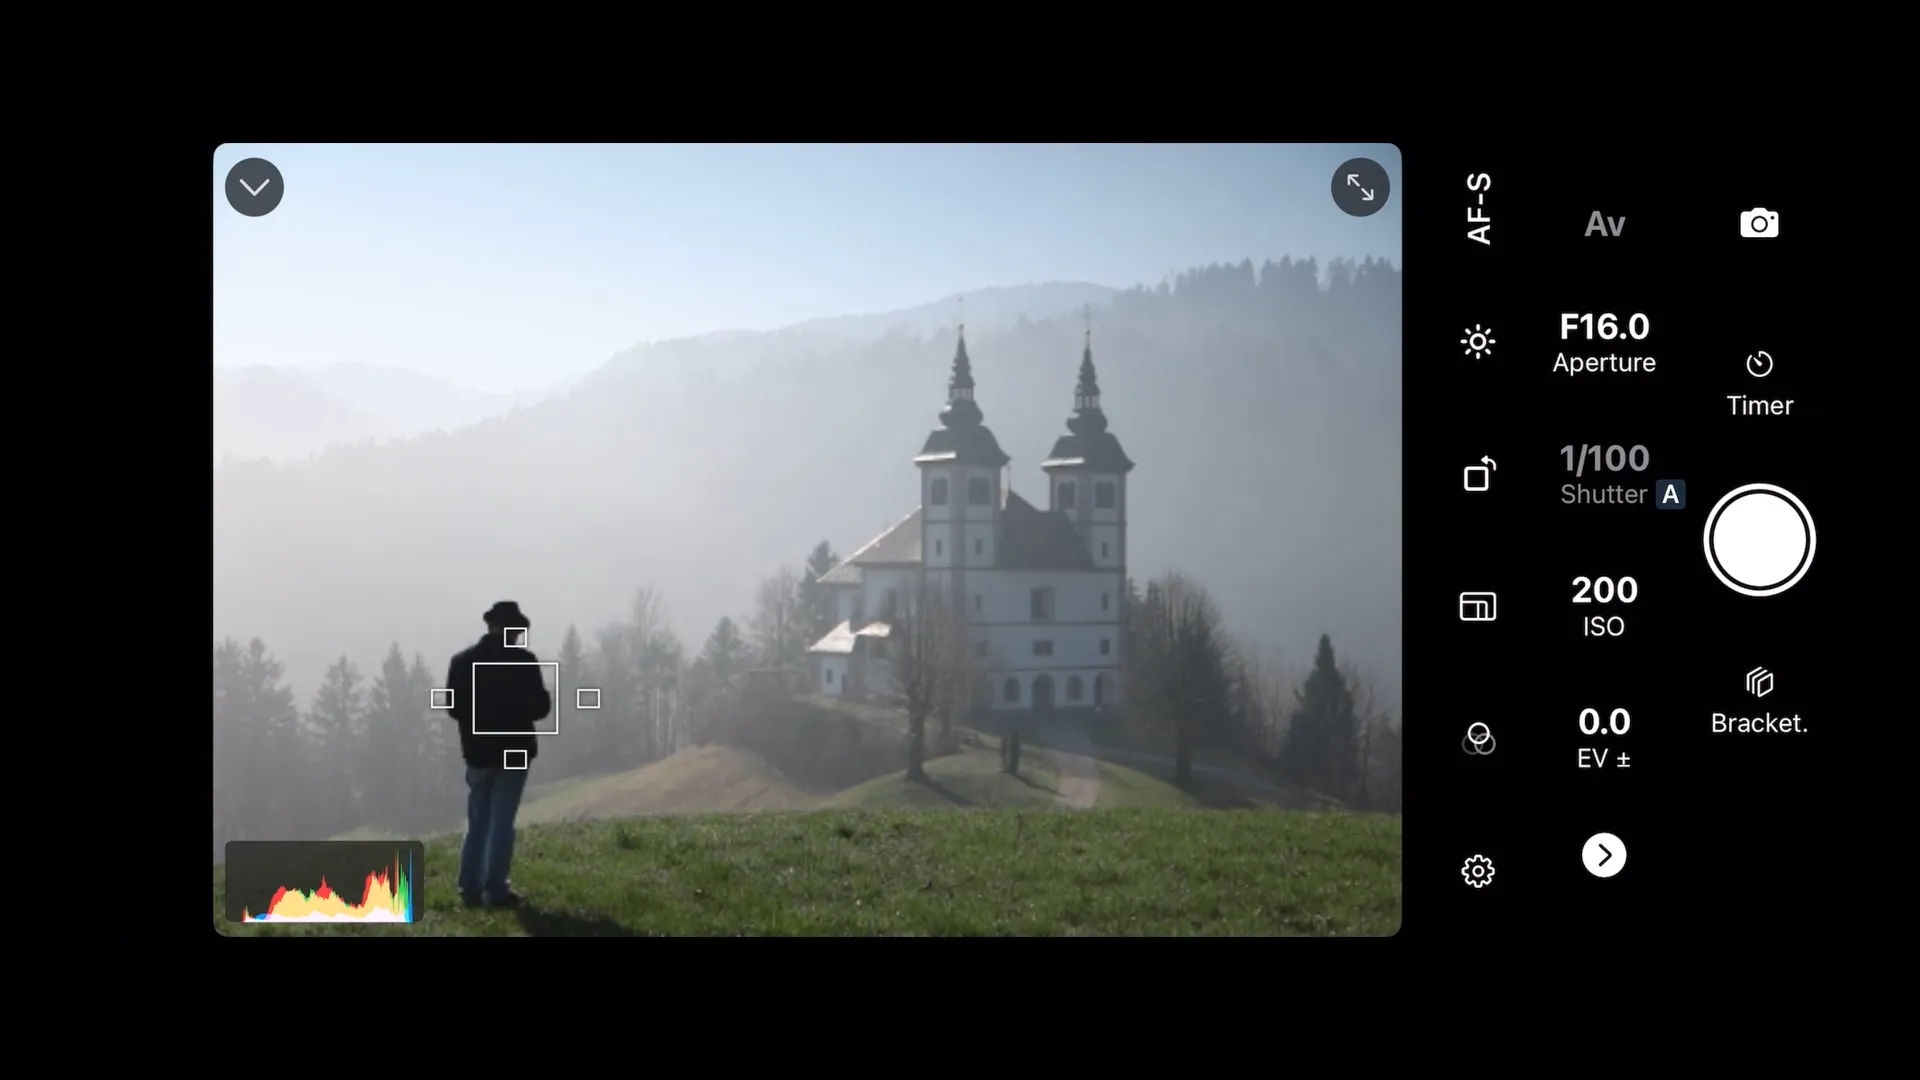
With the live view open, tap your position in the frame on the iPhone screen. Shutter+ directs the camera’s autofocus to that point and locks it. This is particularly important for landscape and outdoor shots, where the camera’s autofocus might otherwise prioritise background elements over your subject.
Set the focus point before starting the timer, while you can still see and interact with the screen.
3. Set the Timer to Give Yourself Time to Get in Position
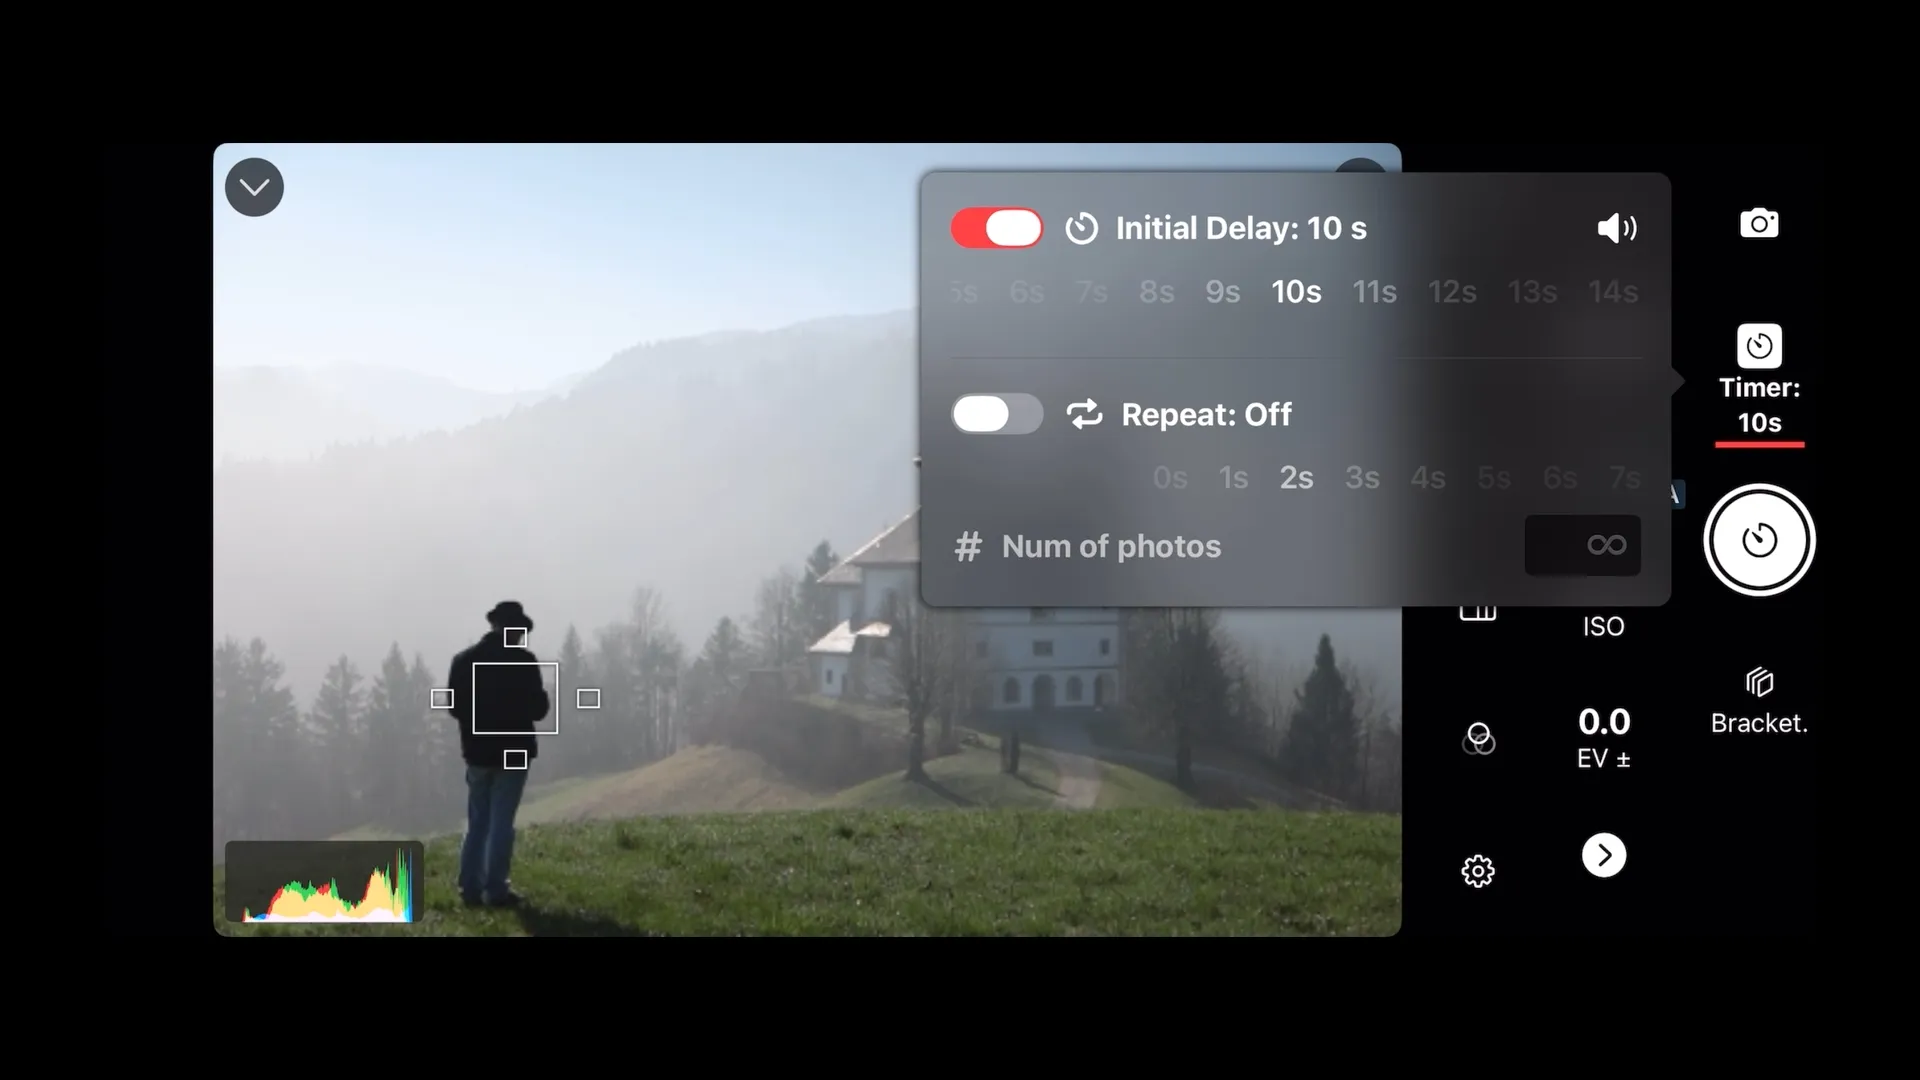
Shutter+‘s timer lets you configure a delay before the shutter fires. Set it long enough to pocket your iPhone, walk to your spot, and settle into a natural position. The countdown is audible, so you’ll know when the shot is about to fire without needing to watch the screen.
4. Use the Intervalometer for Multiple Shots
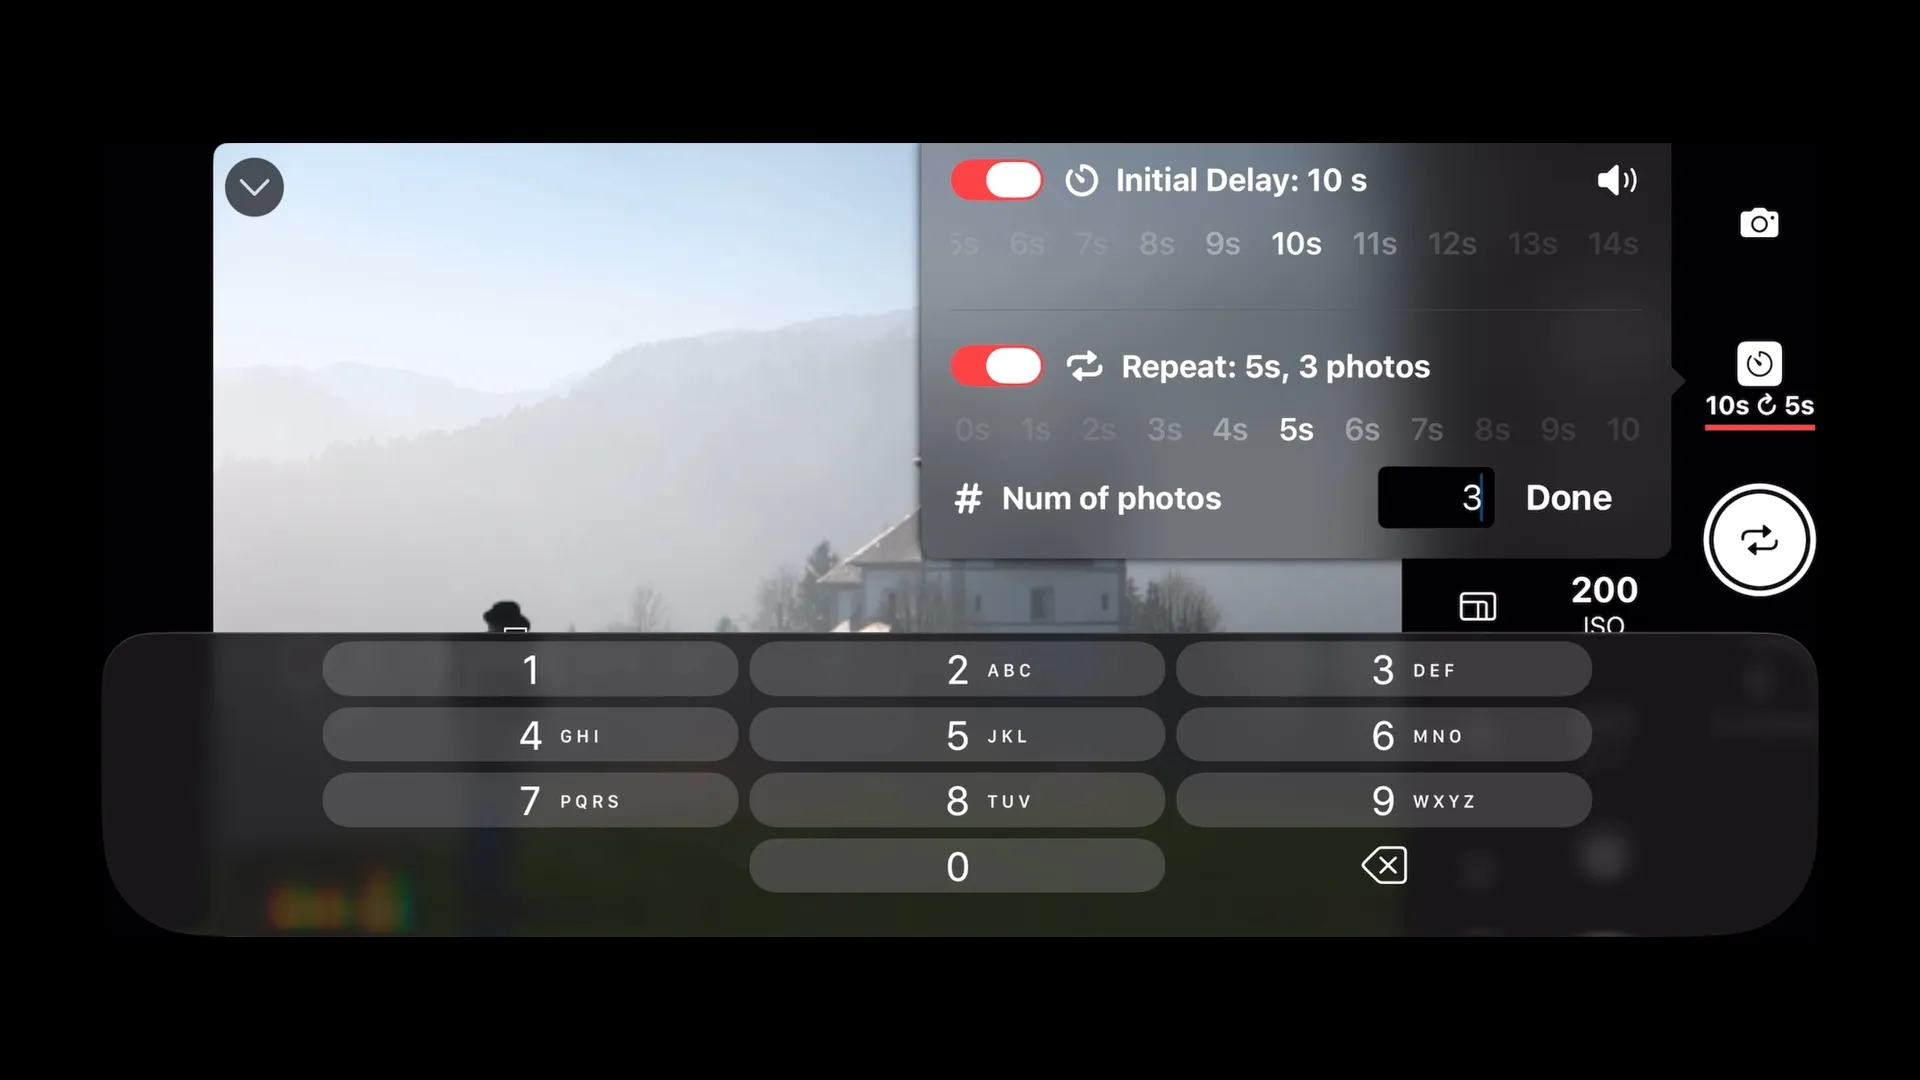
The intervalometer automates a series of shots at set intervals. Configure two things:
-
Number of shots — how many frames to capture in the sequence, or leave it running until you stop it
-
Interval — the time between each shot, giving you time to change pose or expression between frames
Shutter+ refocuses between every shot in the sequence. If you move or shift your pose between frames, the camera adjusts its autofocus before each new capture. This makes it practical to shoot a varied sequence without needing to reset anything manually.
This is useful for selfies (more options to choose from), group photos (increases the chance of everyone looking good at the same time), and landscape self-portraits where natural, unposed frames are often preferable to a single staged shot.
5. Turn on the Sound
Turn on the sound you can hear the countdown and shots taken so you can be prepared each time.
Workflow: Placing Yourself in a Landscape
A common use case combining all four features:
-
Mount your camera on a tripod and open Shutter+ on your iPhone
-
Use the live view to walk into position and confirm your framing
-
Tap to focus on yourself in the frame
-
Set a timer delay — long enough to pocket your phone and compose yourself
-
Configure the intervalometer for the number of shots you want
-
Start the sequence, pocket your phone, and move naturally between frames
The camera fires, refocuses, and fires again automatically until the sequence is complete.

Works Without a Network
Shutter+ connects via Wi-Fi Direct — the camera creates its own local network and your iPhone connects directly to it. No home Wi-Fi, internet connection, or mobile signal is required. This makes it usable in remote outdoor locations where no network is available.
Frequently Asked Questions
How many shots can I set the intervalometer to take? You can set any number of shots, or leave the count open-ended and stop the sequence manually when you’re done.
Does Shutter+ refocus between intervalometer shots? Yes. Shutter+ refocuses before each shot in the sequence. This is not the case with many cameras’ built-in interval functions. Please note that if you move outside the pre-defined focal point the camera will focus on something behind you. In this case, simply stop the sequence, refocus and start again.
Can I use Shutter+ on Apple Watch for self-portraits? Yes. The Apple Watch app lets you trigger the shutter and control the intervalometer from your wrist — useful for triggering a shot while remaining in position.
Does this work for video as well? Yes. You can start and stop video recording remotely via Shutter+, and monitor the live view while recording. The timer and intervalometer features apply to stills only.
Which cameras are supported? Shutter+ is available for Sony Alpha and Cyber-shot, Canon EOS and PowerShot, and Fujifilm X-series and GFX cameras. See the full camera compatibility list →
New to Shutter+? A 7-day free trial is available with no commitment required. See pricing →