How to connect a Sony camera
We’ve designed Shutter+ to be as easy to connect as possible. If you are using an iPhone 7 or newer, you should be able to connect with your Sony Alpha or Cyber-shot simply by touching the NFC logo (little “N” mark) printed on the side of the camera.
“Tap to connect” and done
If you have an iPhone 7 or newer, just follow these simple steps. If you need more information, you’ll find a complete explanation below.
- Open Shutter+ and click “Tap to connect”.
- Locate the
 NFC logo on the side of the camera and touch it with the top edge of your iPhone.
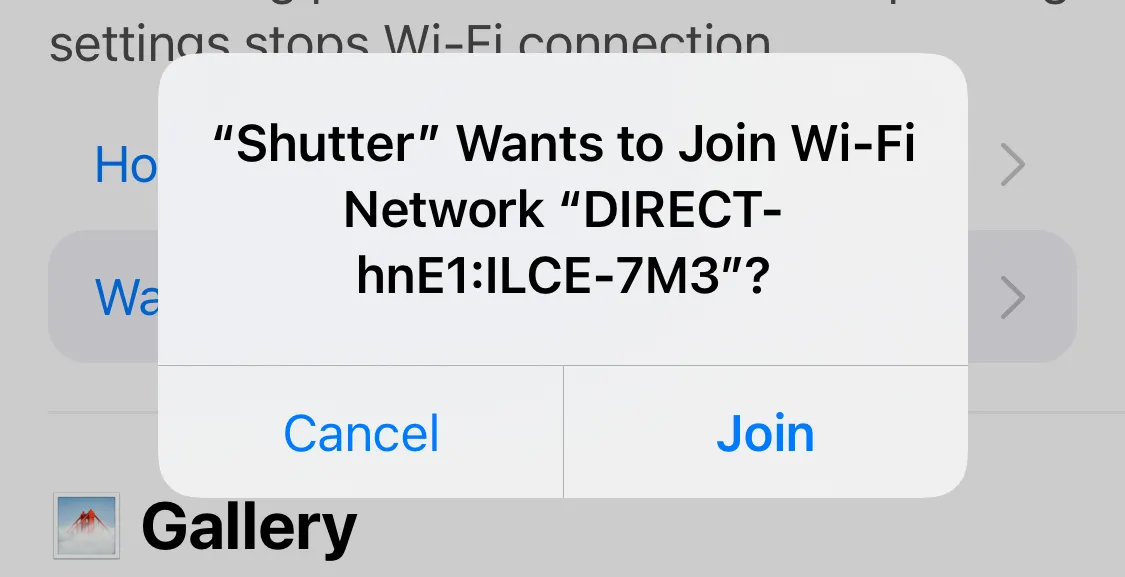
 - Click “Join” to connect with the camera.
- iOS 14 only: if step 3 fails and you see an error, just try again - it resolves the problem.
- That’s it.
“Tap to connect” – longer explanation
If you have an iPhone 7 or newer, Shutter+ will display a “Tap to connect” button at the top of the screen.

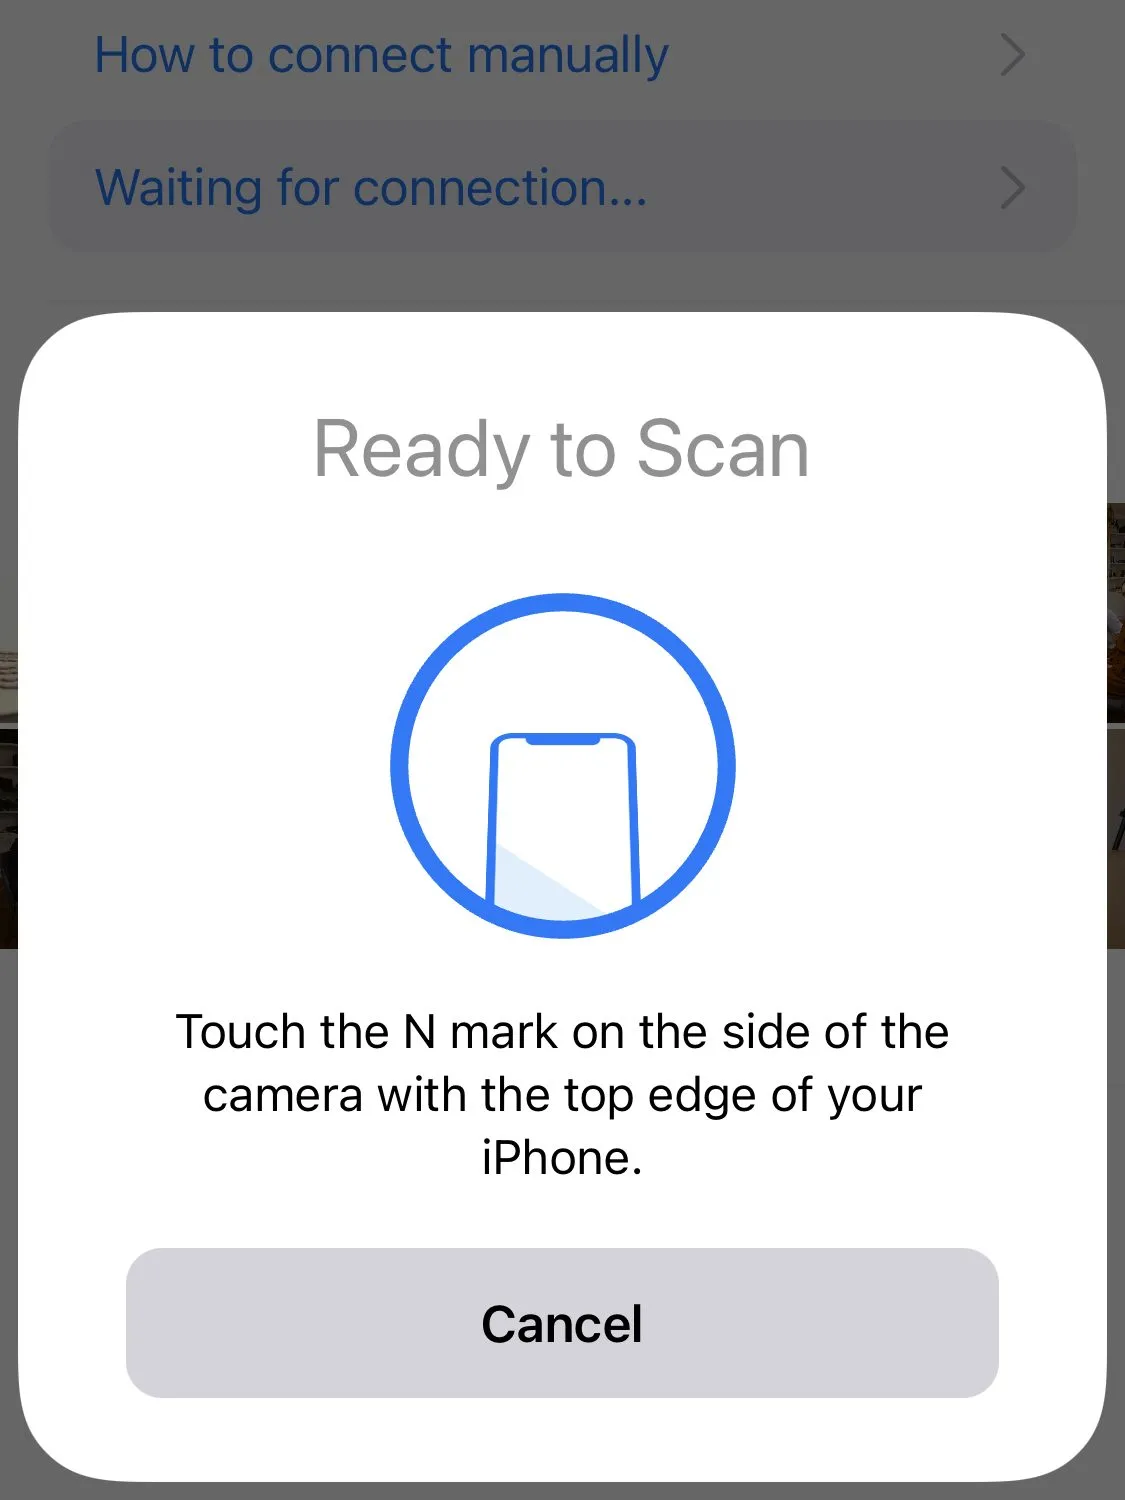
When you click “Tap to connect”, you will be prompted to touch the camera with your phone.
First, click “Tap to connect” to initiate connection process. Then find a little NFC logo printed on the side of your camera. If you have a Sony Alpha (e.g. a5000-series, a6000-series, a7-series, a9-series) camera, it’ll be printed on the grip, right next to the SD card slot. If you have a Cyber-shot (RX-series, ZV-series or other) it’ll be on the left side of the camera.
You need to touch the NFC logo with the top edge of your iPhone. The same way as if you would use Apple Pay. After successful NFC scan, you will be asked if you want to join a Wi-Fi network. Click “Join”.
Technical Note: Sony cameras use Wi-Fi to communicate with remote devices. This doesn’t mean that you need to stay at home or office to use the app. The camera generates its own network that can be used anywhere you want.
On some iOS 14/15 devices, the initial connection attempt might fail and display a “Unable to join the network” error. When that happens, click “Tap to connect” again, touch the “N” mark and click “Join” again. It always succeeds on the second try.
That’s it. You are now connected.
Connect by manually entering camera details
If you are using iPad, iPhone older than iPhone 7, or find NFC impractical due to your setup (e.g. due to a video rig or camera placement), you can manually enter camera details in the iOS Settings app. The initial setup takes a little more time but subsequent connections are really easy.
First, you need to identify what kind of camera you have. Turn on the camera and go to “Menu”. Depending on what you see, choose one of the options below.

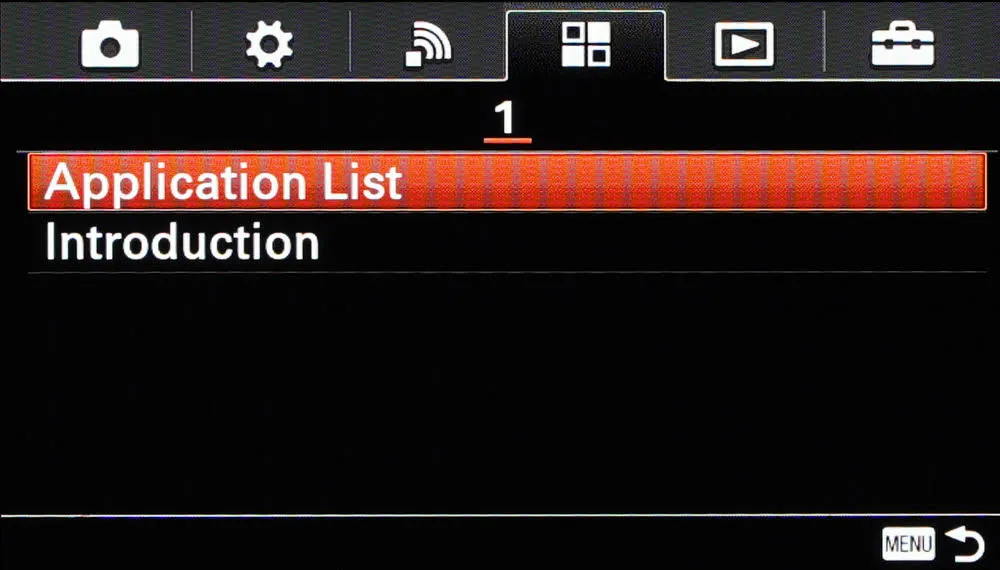
If you see an Applications icon ![]() , go to PlayMemories Cameras.
, go to PlayMemories Cameras.

If you see a green Network icon ![]() , go to cameras released after 2017.
, go to cameras released after 2017.
PlayMemories Cameras
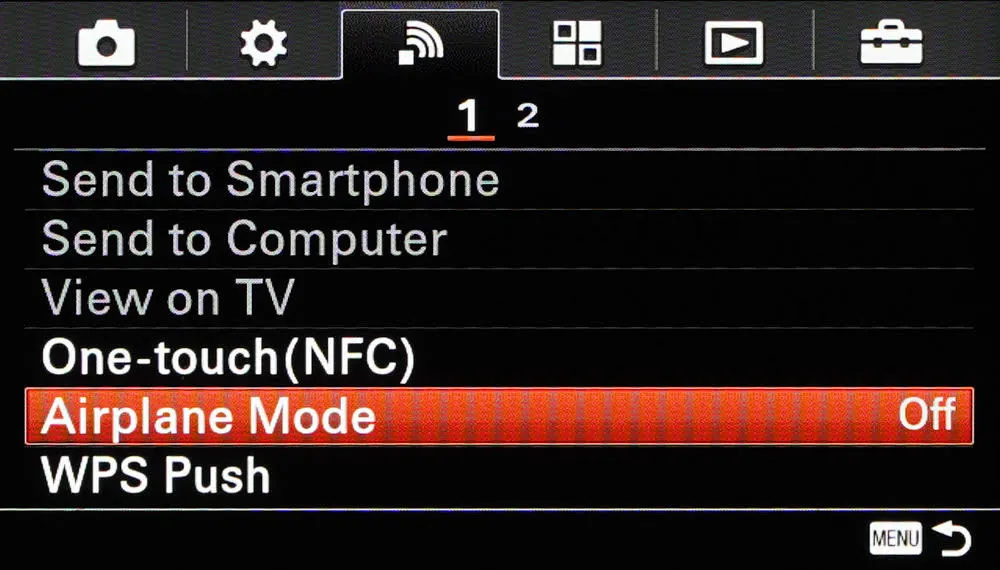
Open Network1 tab and make sure Airplane Mode is switched OFF.
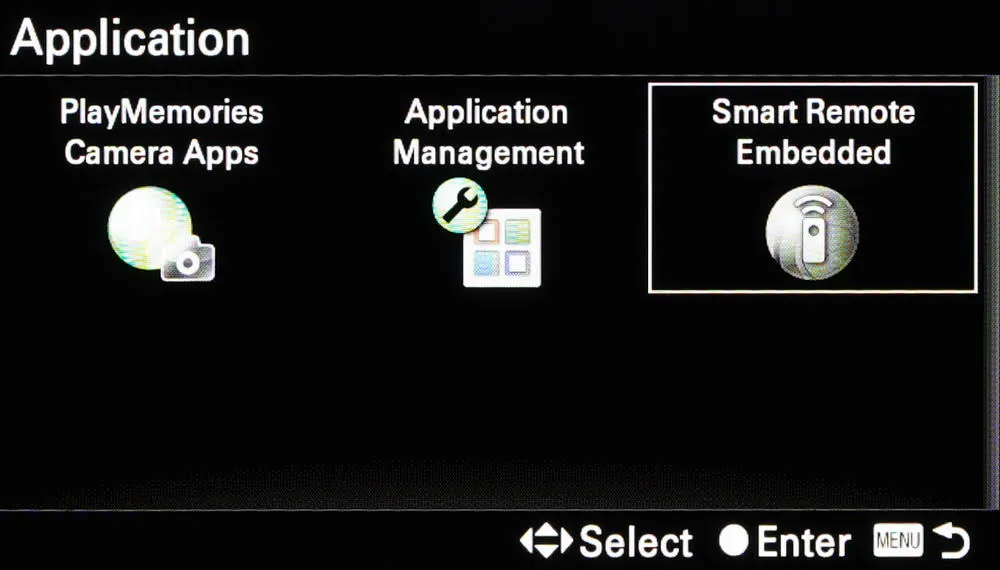
Open Applications List from Applications tab.
Select Smart Remote Control. If you see “Smart Remote Embedded” that’s OK, too. The camera will connect with limited options. Please follow our update guide to enable all features.
Camera will display connection details.
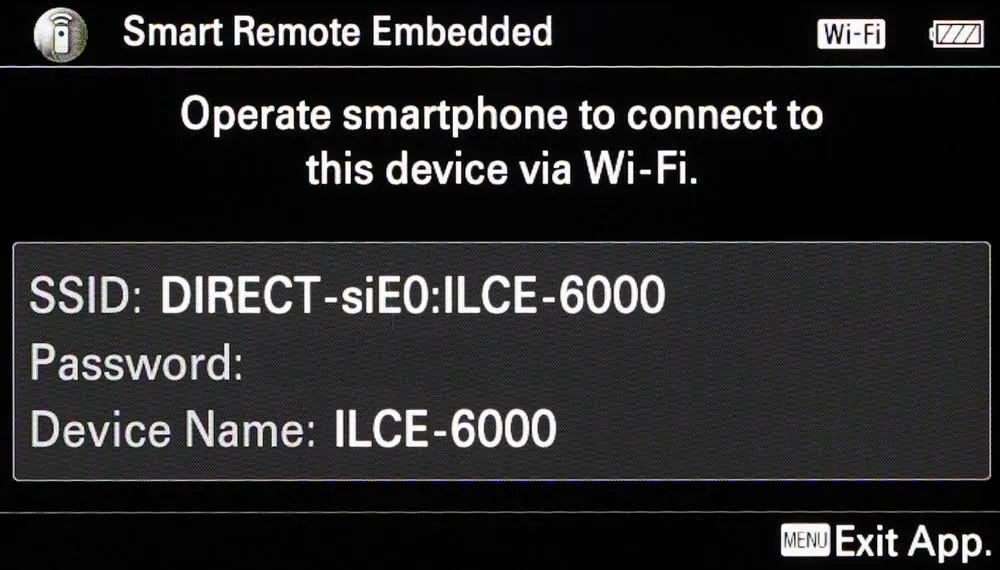
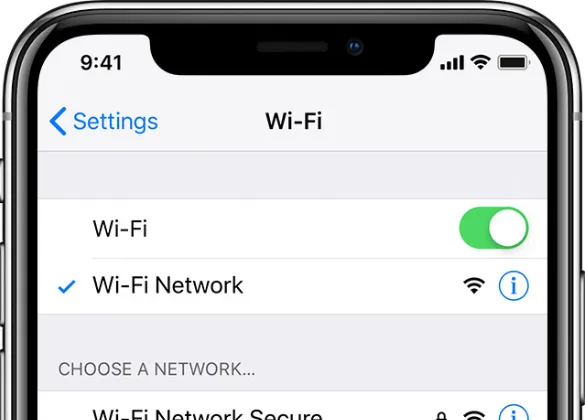
Open your smartphone’s Wi-Fi settings and enter details displayed by the camera.
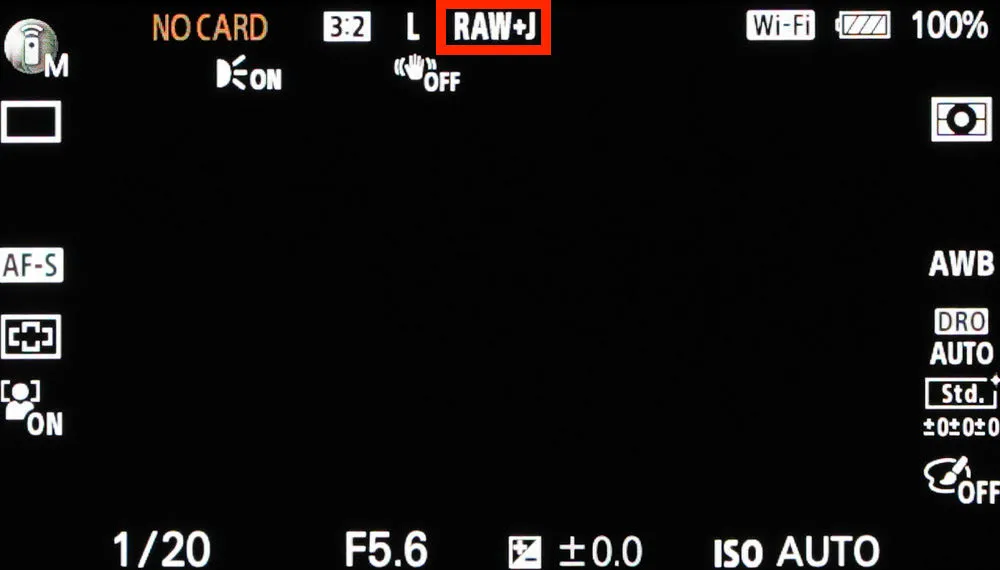
Smart Remote Embedded uses different settings than the default shooting mode. Make sure the file format and exposure settings are right!
Cameras Released After 2017 (Sony a7 III and newer)
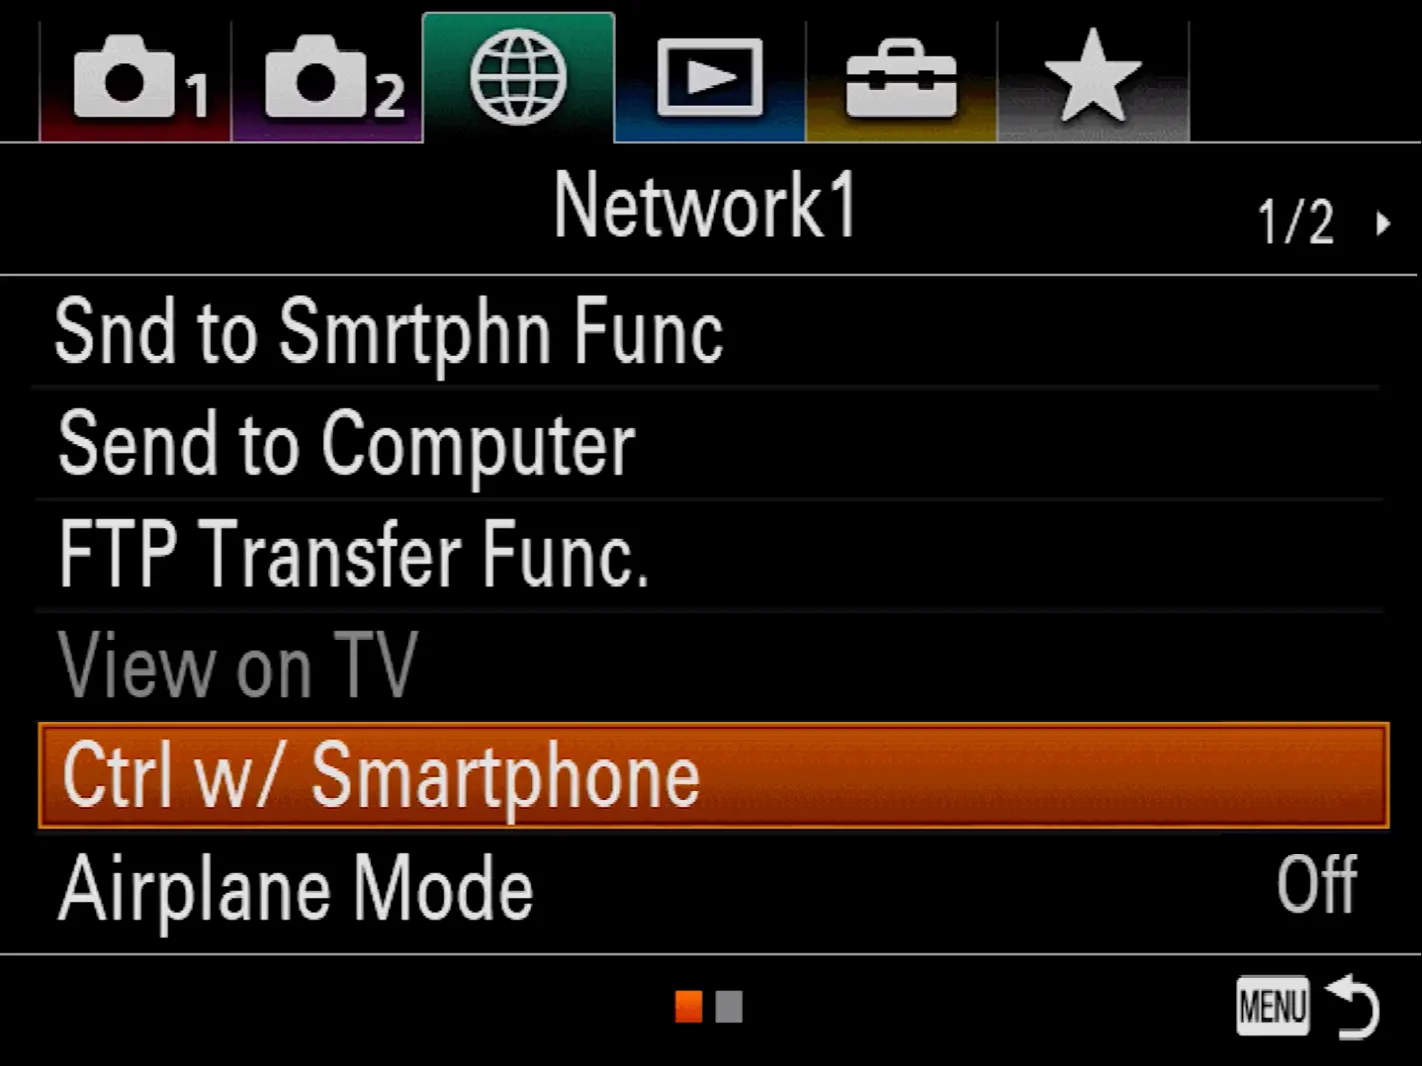
Open Network1 tab in camera Menu. Click on Ctrl w/ Smartphone option.
Make sure both Ctrl w/ Smartphone and Always Connected options are On.
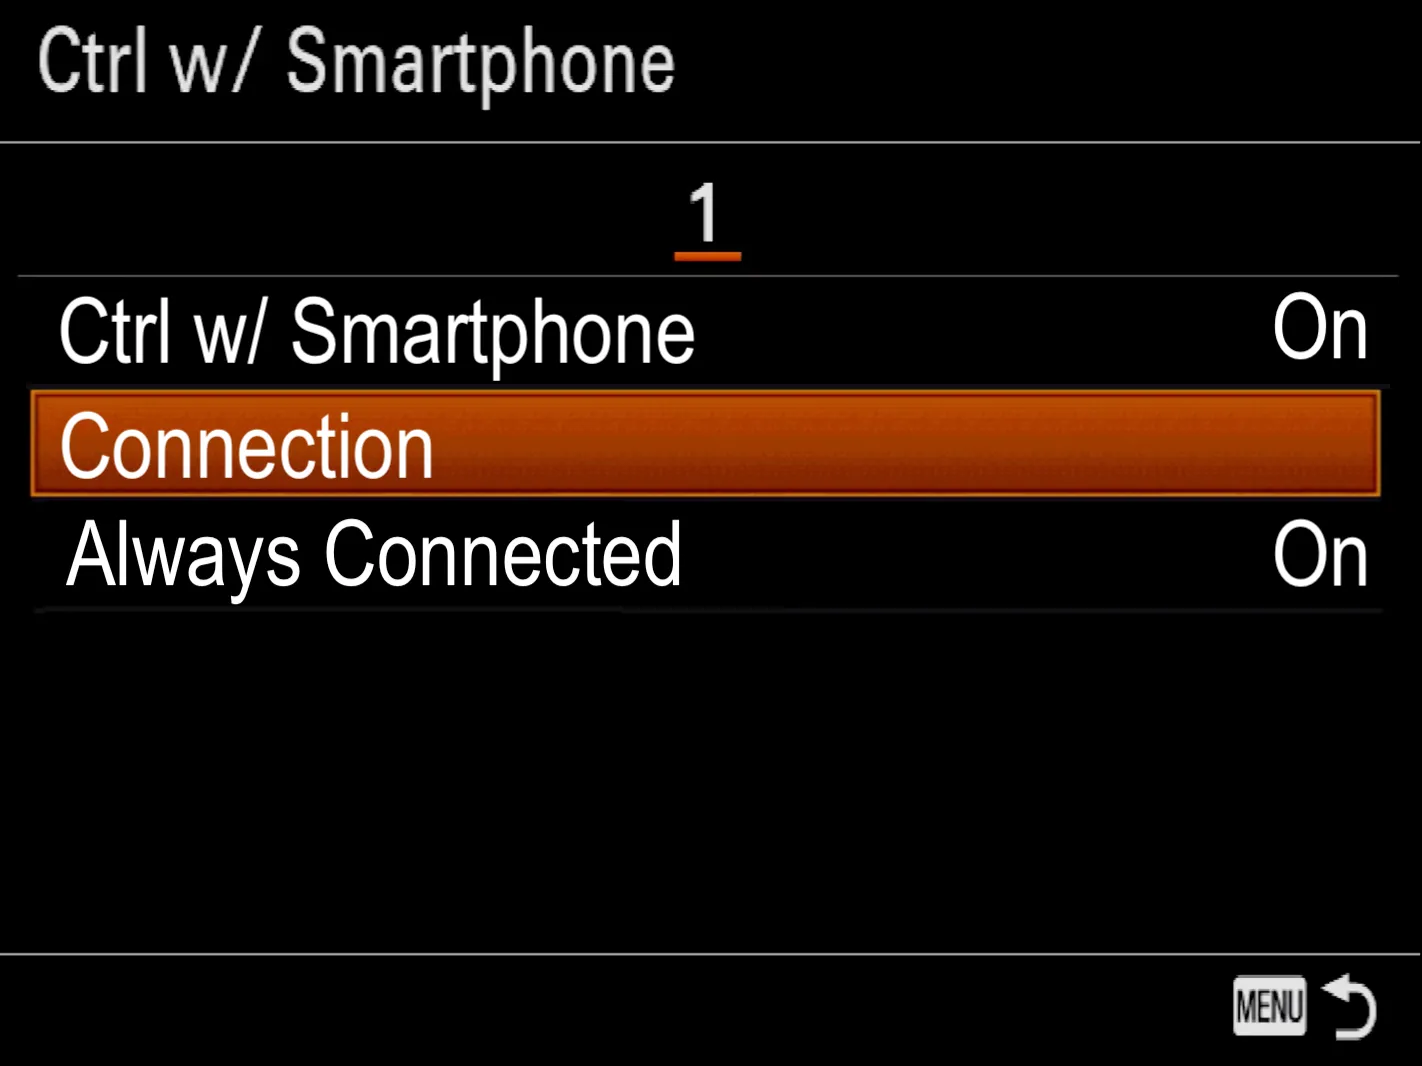
Open Connection page and click trash icon to switch to password view.
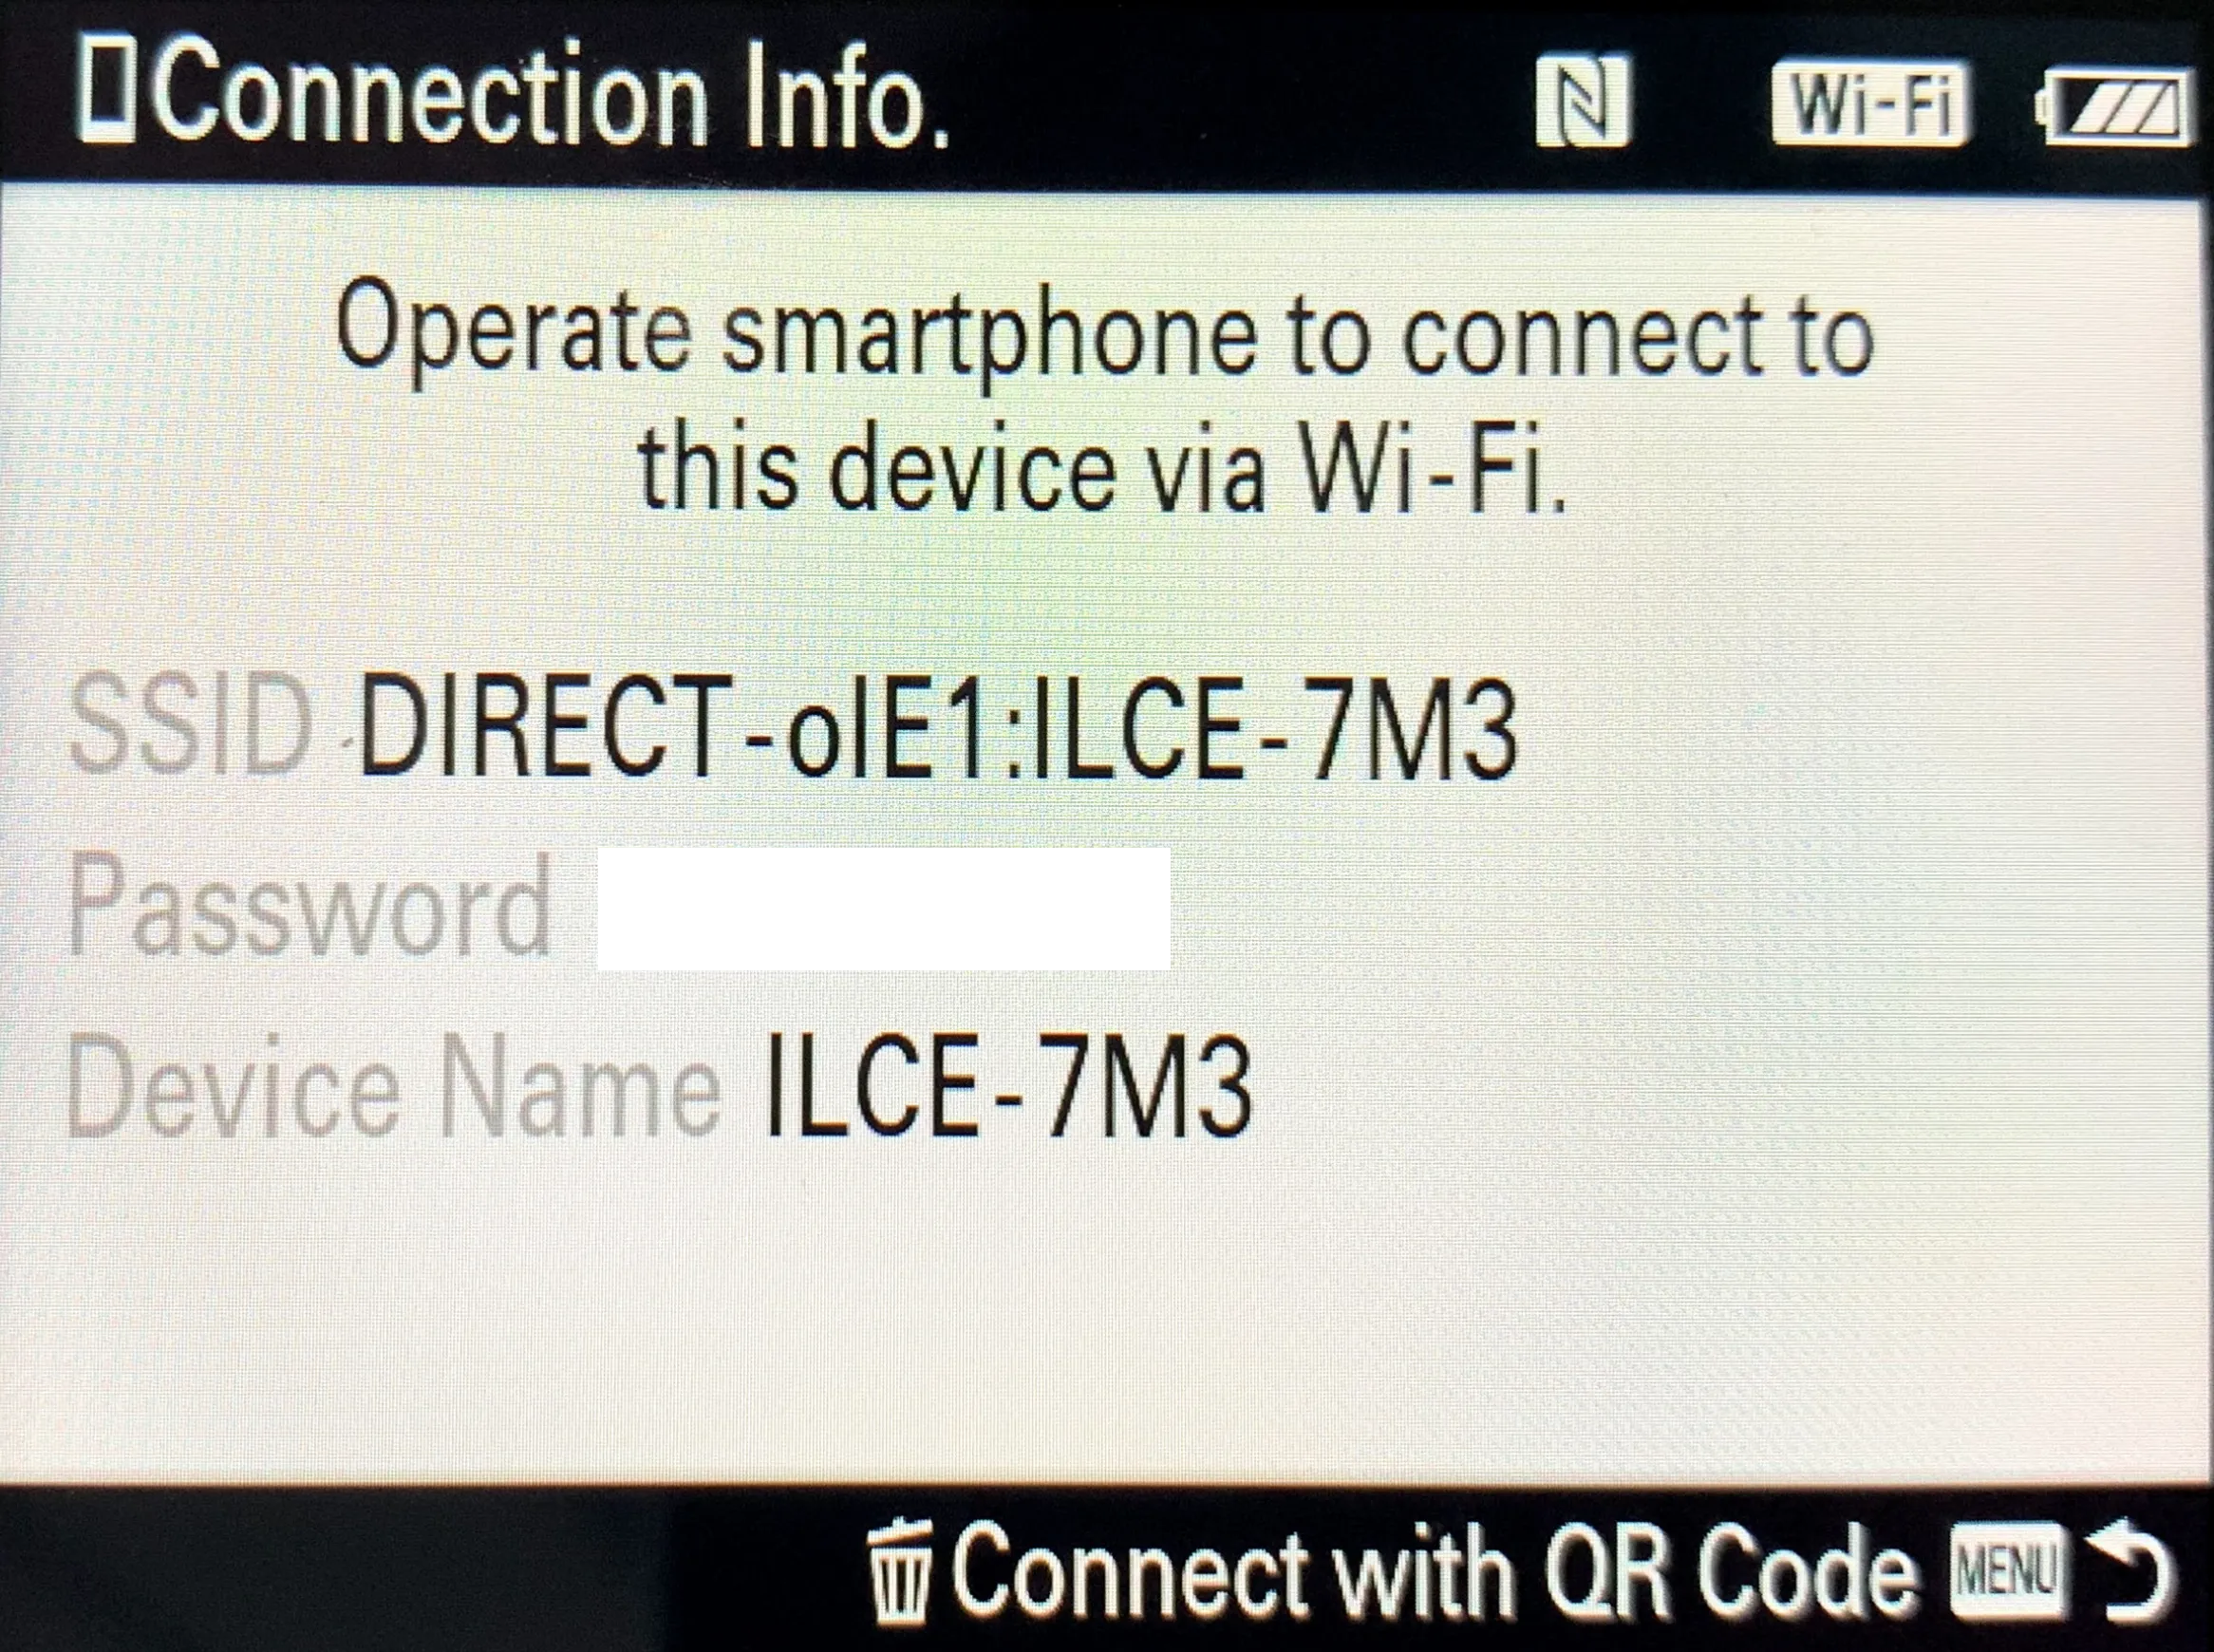
Open your smartphone’s Wi-Fi settings and enter details displayed by the camera.
Connecting Apple Watch to the camera
- Make sure your iPhone is connected to your camera’s network.
- Open the Apple Watch app.
- That’s it! The Watch will automatically detect the camera.