RAW vs JPEG: Which Should You Shoot?
By Ian Middleton · Travel & landscape photographer
Whether you’re a beginner trying to understand your camera’s settings or a seasoned photographer looking to refine your workflow, the RAW vs JPEG question is one of the most debated topics in photography. The short answer? Both formats have a place — and knowing when to use each one can genuinely transform the way you work.
What Is a RAW File?
A RAW file is exactly what it sounds like: the raw, unprocessed data captured by your camera’s sensor. When you press the shutter, the sensor records every bit of information it can — light, colour, dynamic range, shadow detail — and saves it without any in-camera processing. Think of it as a digital negative. Nothing is baked in, nothing is discarded. Everything is preserved, ready for you to develop however you choose.
RAW files are typically much larger than JPEGs. They require dedicated editing software — such as Adobe Lightroom, Capture One, or Apple Photos — to view and process properly. The trade-off for that extra storage and workflow step is extraordinary control and flexibility.
What Is a JPEG File?
JPEG (or JPG) is the format most cameras default to, and it’s the format most people recognise from everyday life. When your camera shoots a JPEG, it processes the image automatically: it adjusts white balance, sharpens the image, applies contrast and colour profiles, compresses the data, and then discards the information it doesn’t need. The result is a smaller, ready-to-use image that can be shared, uploaded, or printed immediately.
This is an important point worth dwelling on: a JPEG is not an “unedited” photo. It is an edited photo — edited automatically by your camera’s software. The camera has made decisions about exposure, colour rendering, sharpening, and noise reduction on your behalf. You simply weren’t the one in the editing seat.
RAW vs JPEG: A Practical Comparison
Feature | RAW | JPEG |
| File size | Large (20–80 MB+) | Small (2–10 MB) |
| Editing flexibility | Maximum | Limited |
| Ready to share | No – requires processing | Yes |
| Dynamic range | Excellent recovery | Poor recovery |
| White balance | Full flexibility | Baked in |
| In-camera processing | None | Applied automatically |
| Best for | Controlled editing, portfolio | Speed, sharing, events |
When Should You Shoot RAW?
Shoot RAW when you want full creative control over every image, and when you’re prepared to invest the time in post-processing.
RAW is the right choice for:
-
Portrait and studio photography, where precise skin tone rendering and fine colour grading matter
-
Landscape photography, where recovering shadow or highlight detail in a high-contrast scene can make or break an image
-
Low-light photography, where you’ll want to reduce noise and recover detail that JPEG compression won’t allow
-
Any situation where the lighting is tricky or unpredictable and you’d rather have maximum latitude to fix it later
-
Portfolio or client work where image quality is non-negotiable
The main trade-off is workflow time. RAW files need to be imported, reviewed, and processed before they’re usable. If you shoot hundreds of frames, that’s a significant commitment.
When Should You Shoot JPEG?
Shoot JPEG when speed matters more than editing flexibility.
JPEG is the right choice for:
-
Sports and action photography, where you need fast burst rates and a full buffer
-
News and photojournalism, where images need to reach a picture desk or wire service within minutes
-
Events photography, where clients expect same-day or next-day delivery of hundreds of images
-
Social media content, where the image goes straight from camera to phone to feed
-
Street photography, where spontaneity is more important than technical perfection
Many professional photographers who work in fast-moving situations trust their camera’s JPEG output completely — fine-tuning their in-camera picture profiles and working with files that are essentially print-ready. That’s a legitimate, professional approach.
When Should You Shoot RAW + JPEG Simultaneously?
Most modern cameras allow you to capture both a RAW file and a JPEG at the same time for every shot. It takes up more storage, but the benefits in the right circumstances are significant.
Shoot RAW + JPEG when:
-
You’re learning photography. Having both files gives you a safety net. The JPEG shows you what the camera thinks the image should look like; the RAW gives you the flexibility to develop your own interpretation.
-
You need to deliver fast but also want the best shots edited. A wedding photographer might hand over JPEGs to a client’s social media team the same evening, while keeping the RAWs to produce the final edited gallery.
-
You want a reference file. The JPEG acts as a visual benchmark when you sit down to edit the RAW.
-
You want backup flexibility. If you’re pressed for time and can’t process RAWs, the JPEGs are always there as a deliverable fallback.
How to Quickly Preview and Transfer RAW and JPEG Files to Your iPhone or iPad
One of the practical challenges of shooting RAW is getting the files off your camera when you’re away from your desktop. This is where Shutter+ becomes an invaluable part of your workflow.
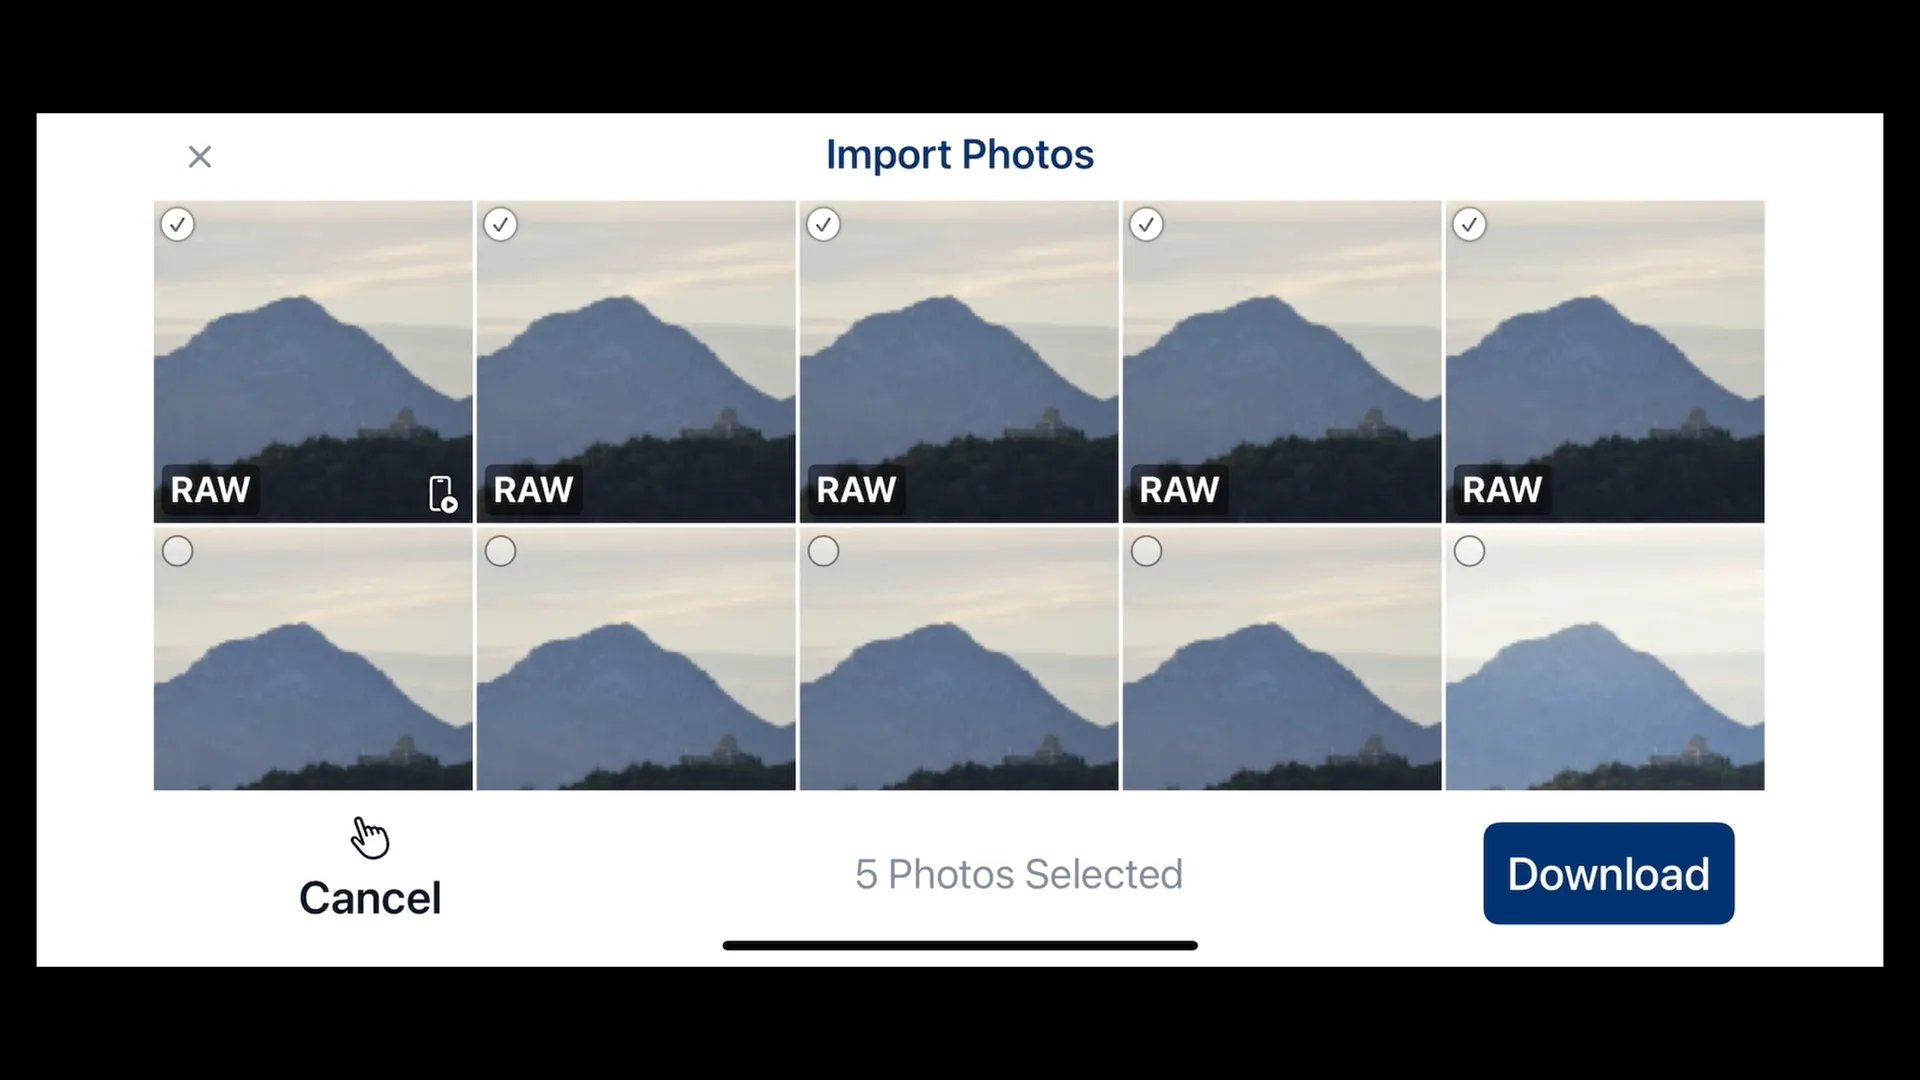
Shutter+ is a remote control and photo management app for iPhone, iPad, and Apple Watch, built for Sony, Canon, and Fujifilm cameras. Alongside its powerful remote shooting features, it includes a Photo Import function that lets you browse your camera’s memory card directly from your iOS device — and download either RAW or JPEG files — without needing a card reader or a laptop.
How Photo Import Works in Shutter+
Once connected to your camera — either wirelessly via Wi-Fi Direct (no internet or home network required) or via USB cable — you can browse every image on the memory card from your iPhone or iPad. Shutter+ lets you filter images by date, star rating, or file format, so if you only want to pull the JPEGs for a quick social media post, you can do exactly that. When you’re ready to edit, you can pull the RAWs.
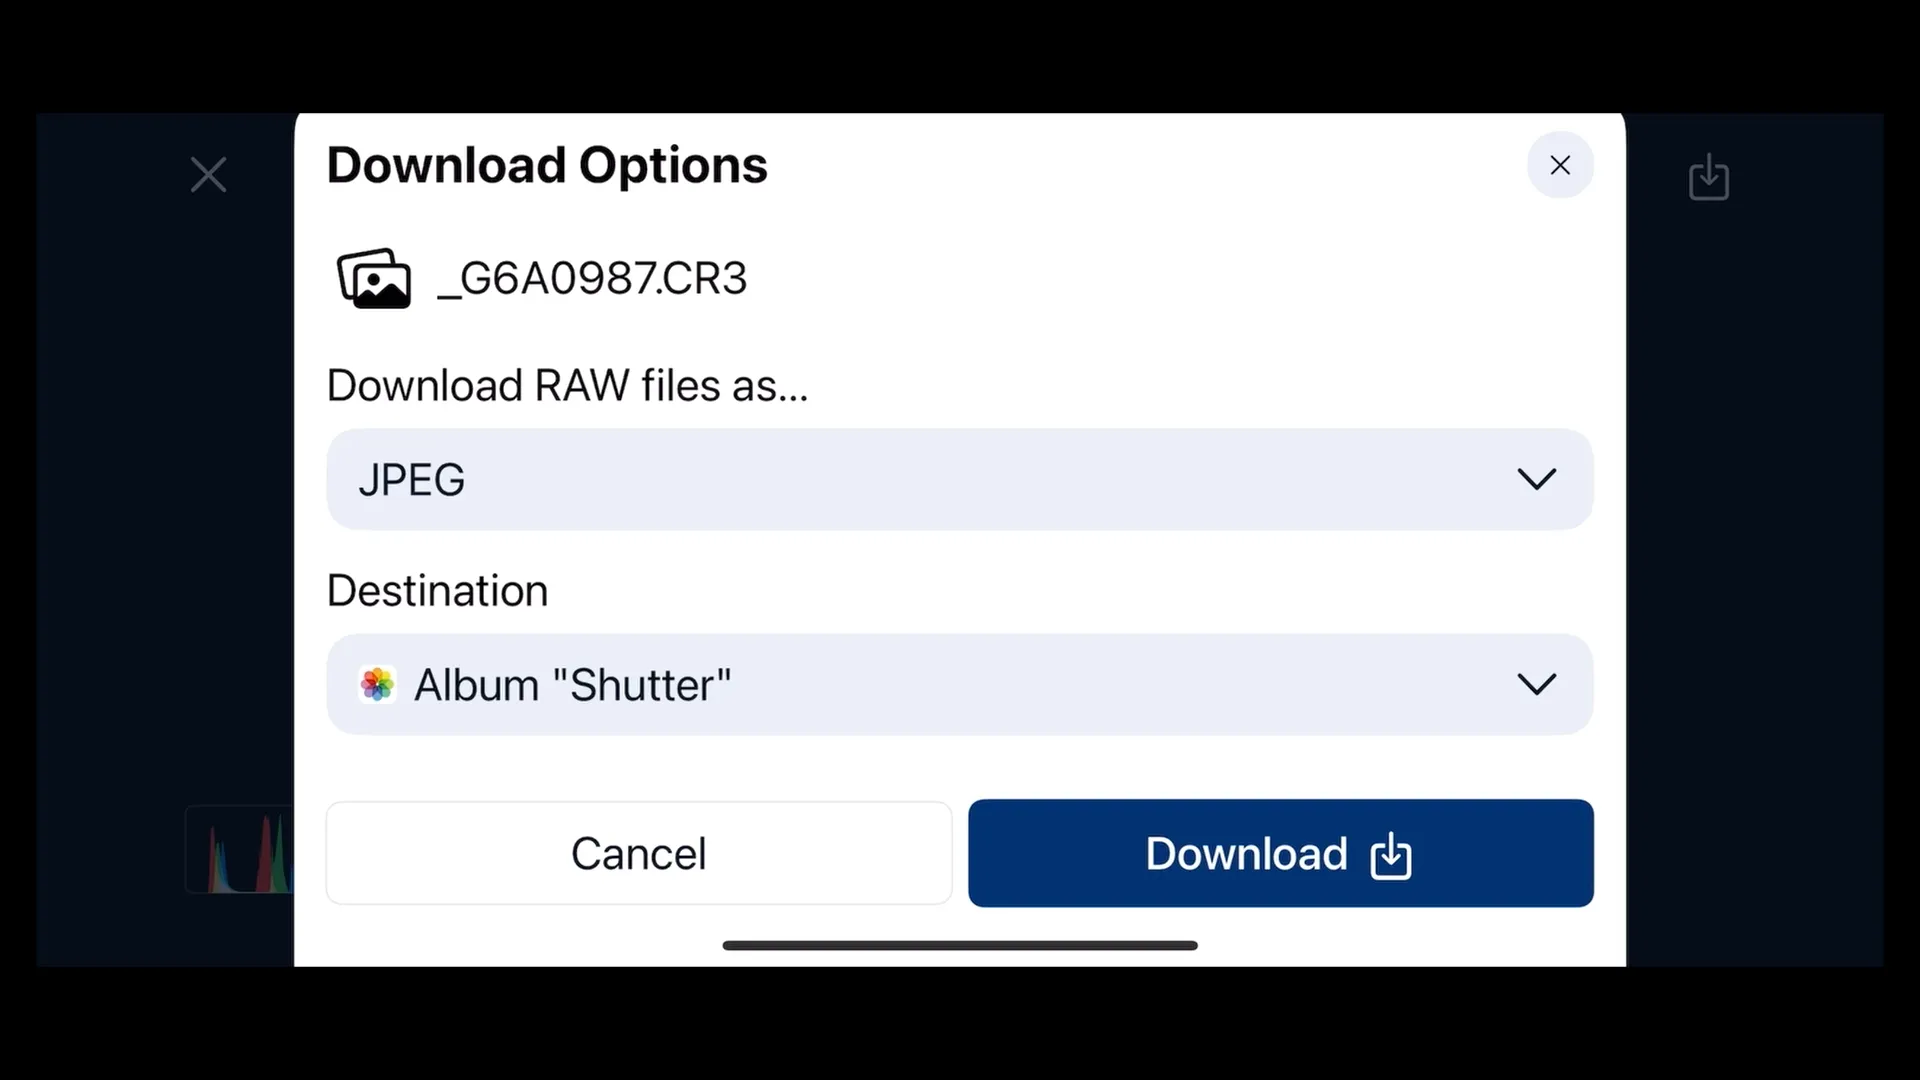
For photographers who shoot RAW + JPEG simultaneously, this workflow is particularly smooth. Transfer the JPEGs immediately for anything that needs to go out quickly, then download the RAW files at your own pace for the images you want to edit properly. You can also choose how to download the RAW file, so could convert it to a jpeg immediately (although this would then be an unedited RAW).
The wireless connection uses the camera’s own Wi-Fi Direct network, which means you can use Shutter+ anywhere — in the field, at a location shoot, or at the back of a venue — without needing to be on a network. USB connection is also fully supported for faster transfers when you have a cable handy.
Why This Matters in Practice
Consider a wedding photographer: they’re shooting RAW + JPEG throughout the day. During the reception, they connect Shutter+ to their camera, filter for the best JPEG images from the ceremony, and send a handful of hero shots to the couple’s family within hours. Weeks later, they sit down with the RAW files and produce the full edited album. Two completely different deliverables, from one set of files, without ever needing a laptop on location.
Or consider a landscape photographer: they’re out at golden hour, shooting RAW for maximum dynamic range. Back at the car, they open Shutter+ on their iPad, pull a few of the best shots, and can see immediately — on a larger screen than the camera’s LCD — whether they’ve nailed the shots they wanted.
RAW vs JPEG for Specific Camera Brands
Sony RAW vs JPEG
Sony cameras — including the popular Alpha series — produce excellent JPEG output with Sony’s Creative Looks profiles, but their RAW files (in ARW format) offer exceptional dynamic range for editing. Sony RAW files respond beautifully to shadow recovery and selective colour adjustments, making them well-suited to landscape and portrait work. Shutter+ supports both wireless and USB connections for Sony cameras.
Canon RAW vs JPEG
Canon’s in-camera Picture Styles can produce pleasing JPEGs, particularly with the Portrait and Landscape presets. Canon RAW files (CR2 and CR3) give you full latitude for professional retouching and colour grading. Many Canon shooters use the Camera Connect app to transfer files — but Shutter+ is widely regarded as a significantly more reliable and feature-rich alternative.
Fujifilm RAW vs JPEG
Fujifilm occupies a unique position in this debate. Fujifilm’s Film Simulations — Velvia, Provia, Classic Chrome, Eterna, and others — are among the best in-camera JPEG processing of any manufacturer, and many Fujifilm photographers genuinely prefer to shoot JPEG and rely on the film simulations as the finished look. That said, Fujifilm’s RAF RAW files still provide significantly more flexibility for exposure recovery and colour correction when you need it.
Frequently Asked Questions
Is RAW better than JPEG?
Not categorically. RAW offers more editing flexibility and higher quality output when processed well. JPEG offers speed and convenience. The right format depends on your workflow and your priorities for each shoot.
Does shooting RAW make you a better photographer?
Not on its own — but it can help you learn. Editing RAW files forces you to engage with every element of an image: exposure, white balance, contrast, colour. Over time, that understanding feeds back into how you shoot.
Can I convert JPEG to RAW?
No. Once the camera has processed a JPEG and discarded the raw data, that information is gone. You can edit a JPEG, but you can’t recover the dynamic range or detail that a RAW file would have contained.
Should beginners shoot RAW or JPEG?
For beginners, shooting RAW + JPEG simultaneously is often the best approach. The JPEGs give you immediately usable images; the RAWs give you material to learn from and edit. As your workflow develops, you can decide which format suits your photography better.
What is SOOC photography?
SOOC stands for Straight Out Of Camera. It refers to images shared without any post-processing editing. However, SOOC images are still processed — by the camera’s own software. Every digital photograph has been edited in some way.
Can I transfer RAW files wirelessly to my iPhone?
Yes. Using an app like Shutter+, you can connect to compatible Sony, Canon, or Fujifilm cameras via Wi-Fi Direct or USB and download RAW or JPEG files directly to your iPhone or iPad — no computer or card reader needed.
The Bottom Line
RAW and JPEG are not competitors — they’re tools, and like all tools, their value depends on how and when you use them.
If you’re shooting a news event and an editor needs images in fifteen minutes, JPEG is the professional choice. If you’re photographing a landscape at sunrise and want to spend an evening coaxing every last detail out of the shadows and sky, RAW is the professional choice. If you’re learning, shoot both.
The idea that one format is more “authentic” or “legitimate” than the other is a myth worth setting aside. What matters is the image you end up with — and the workflow that gets you there as efficiently and creatively as possible.
Tools like Shutter+ make managing both formats easier than ever, letting you browse, filter, and transfer RAW or JPEG files wirelessly or via USB from your camera to your iPhone or iPad — wherever you happen to be shooting.
Whatever format you choose, shoot with intention. Then edit with care. The rest is just file format.
Shutter+ is available for iPhone, iPad, and Apple Watch, with support for Sony, Canon, and Fujifilm cameras. Connect wirelessly or via USB to remote control your camera, monitor your shot, and import RAW or JPEG files directly to your iOS device. Learn more and download Shutter+.