Exposure Bracketing
Exposure bracketing takes multiple shots at different exposure levels. You can merge the results in post-processing software to create HDR images with more dynamic range than a single exposure.
This is software-controlled bracketing managed by Shutter+ — it works independently of any built-in bracketing on your camera.
Enabling Exposure Bracketing
The camera needs to be in a single photo drive mode (see Shooting Modes). For best results, we recommend setting your camera to fully Manual exposure mode (M) with a fixed ISO and using Shutter Speed for bracketing.
Tap on the Bracket. button next to the shutter release button to open the menu, then toggle Exposure Bracketing and choose your desired settings.
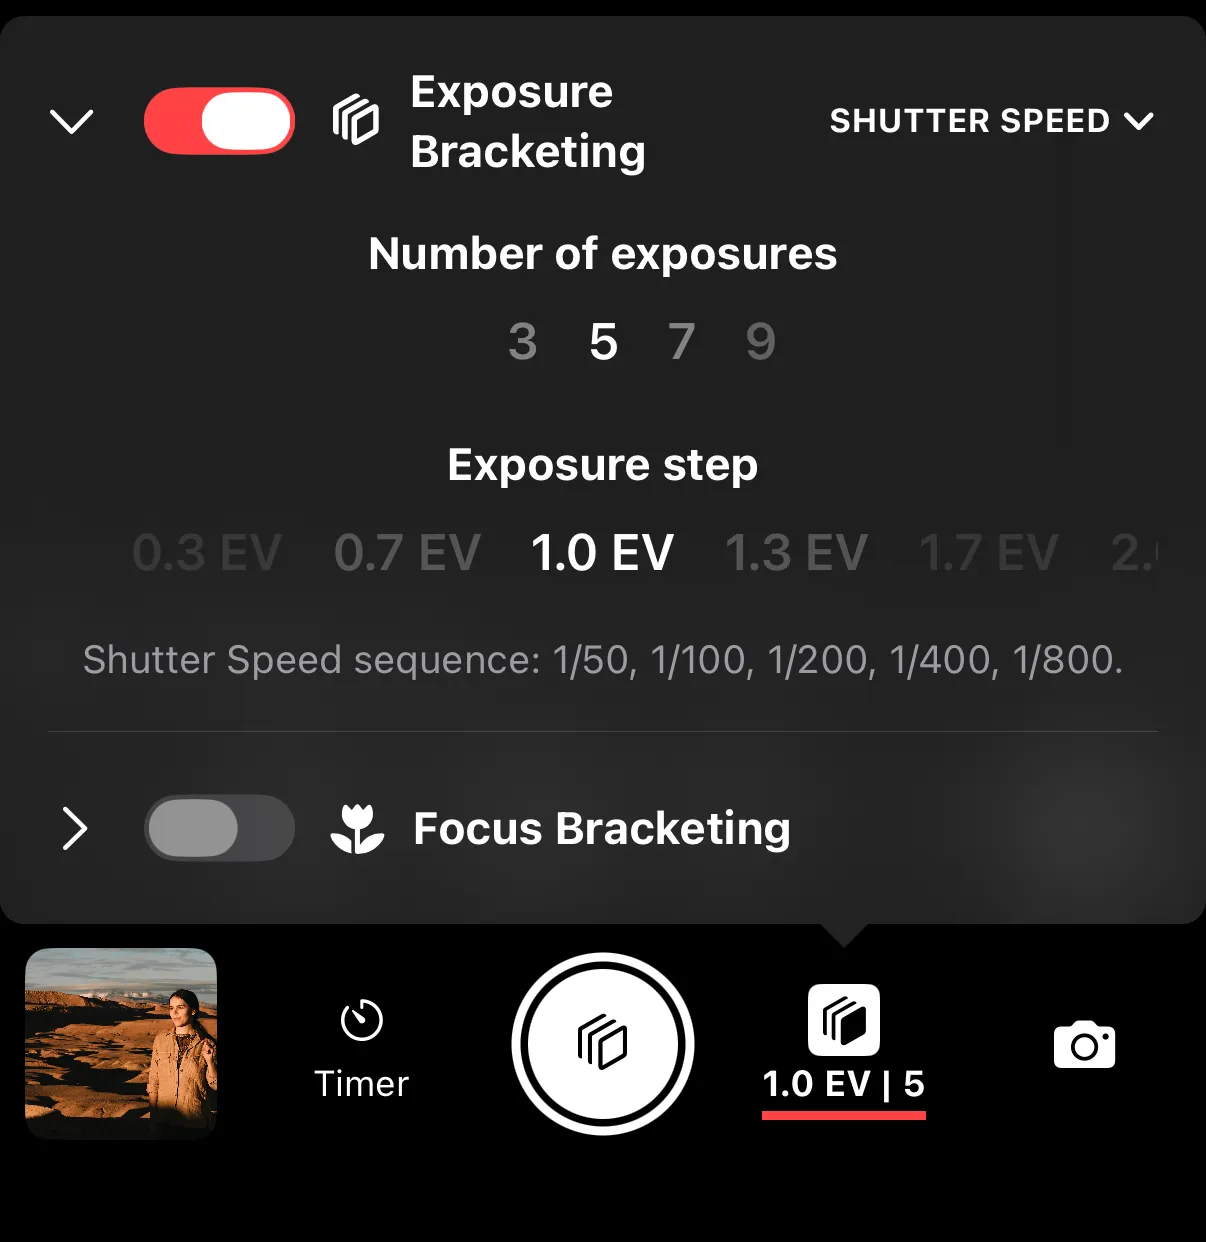
Settings
Number of exposures — how many shots to take. The default is 3.
EV step — the exposure difference between each shot, in EV stops. The default is 1.0 EV.
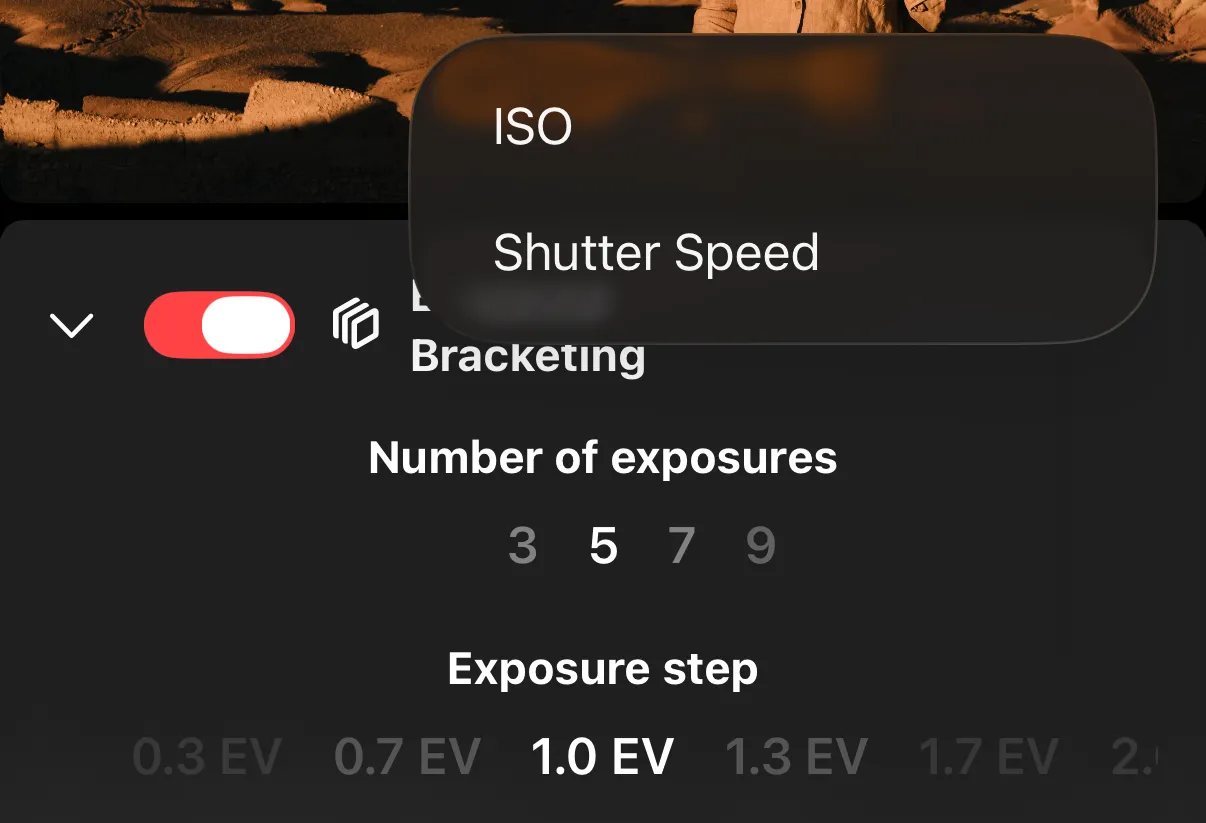
Bracketing property — which exposure parameter to vary between shots:
| Property | How It Works |
|---|---|
| Shutter Speed (Recommended) | Changes shutter speed while keeping other settings fixed |
| ISO | Changes ISO while keeping other settings fixed. Not recommended as modern cameras are close to being ISO-invariant. |
| Exposure Compensation | Adjusts EV compensation for each shot. The only option in auto-exposure modes (not recommended). |
Before shooting, the app displays the planned exposure sequence so you can verify the values. The current exposure value is always in the middle of the sequence. Half of the photos will be darker and half will be brighter than the current exposure.
When darker or brighter exposures are not available in the camera, the sequence might be clipped on one side. On Sony cameras, bracketing will automatically go into BULB exposure mode for exposures longer than max available shutter speed.
Requirements
- The camera must be in Single Photo drive mode.
- The camera must be in a manual or semi-manual exposure mode (not full Auto).