Downloading Photos
You can download photos from your camera to your iPhone over Wi-Fi or USB.
Downloading Individual Photos
When the photo preview is open, tap the download button left of the photo name to save it.
Batch Download
Tap Select button in the toolbar to enable selection mode. In selection mode:
- Tap on a photo to select/deselect it.
- Tap on a header (e.g. a date) to select the entire group.
- Drag across photos to quickly make a rectangular selection.
The number of selected photos appears at the bottom of the screen. Tap Download to confirm the selection.

Download Options
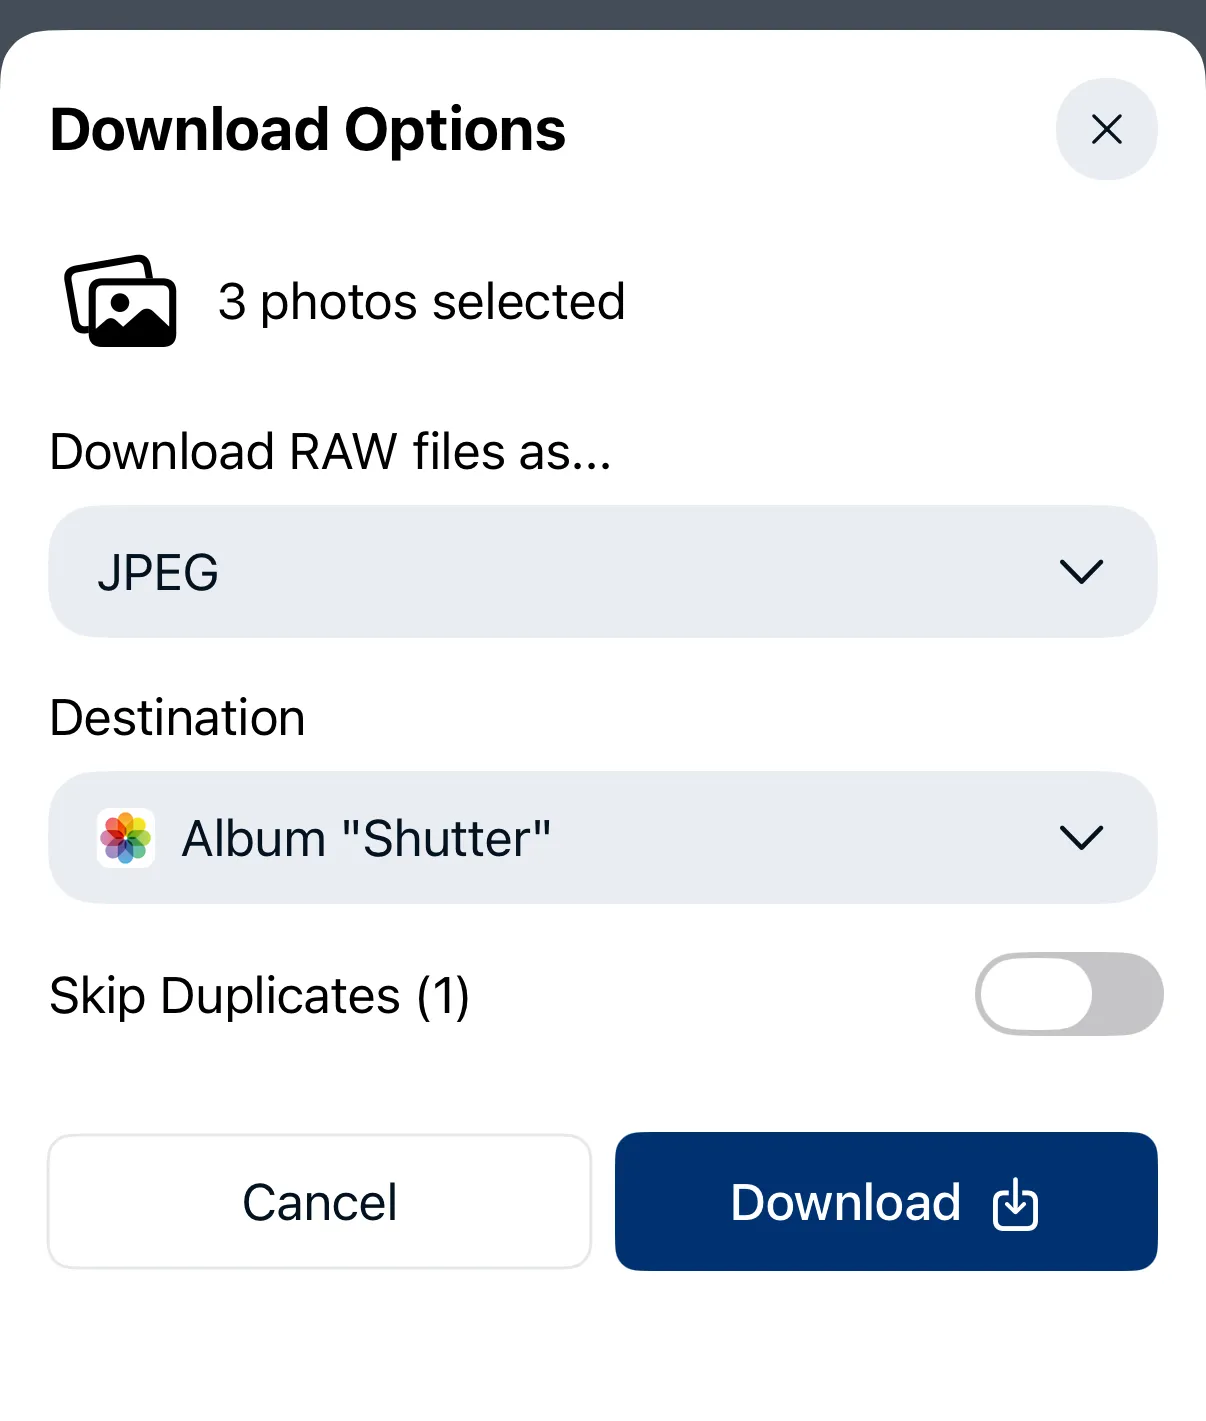
Quality Options
If your selection contains RAW files, depending on your camera model, you might be able to control import quality. In the Download RAW files as… field you can choose between:
| Quality | Description |
|---|---|
| RAW | Full-resolution RAW file. Larger file size, slower transfer. |
| JPEG | Develop RAW file in camera. Much faster, good for quick sharing with friends and family. |
RAW quality is useful when you need the full file on your iPhone, e.g. for post-processing.
Save Destination
Choose where downloaded photos are saved:
- Photos app — saves to your iPhone or iCloud photo library. You can select or create a specific album.
- Files app — saves to a folder of your choice.
By default all photos are stored in the Shutter+ album in the Photos app.
Skip Duplicates
When Shutter+ detects that some photos in your selection were downloaded already, it shows an option to skip duplicates. This only works with photos saved to the Photos app.
Download Progress
Tap on the Download button to start downloading photos from the camera. You’ll see progress as photos are downloaded.
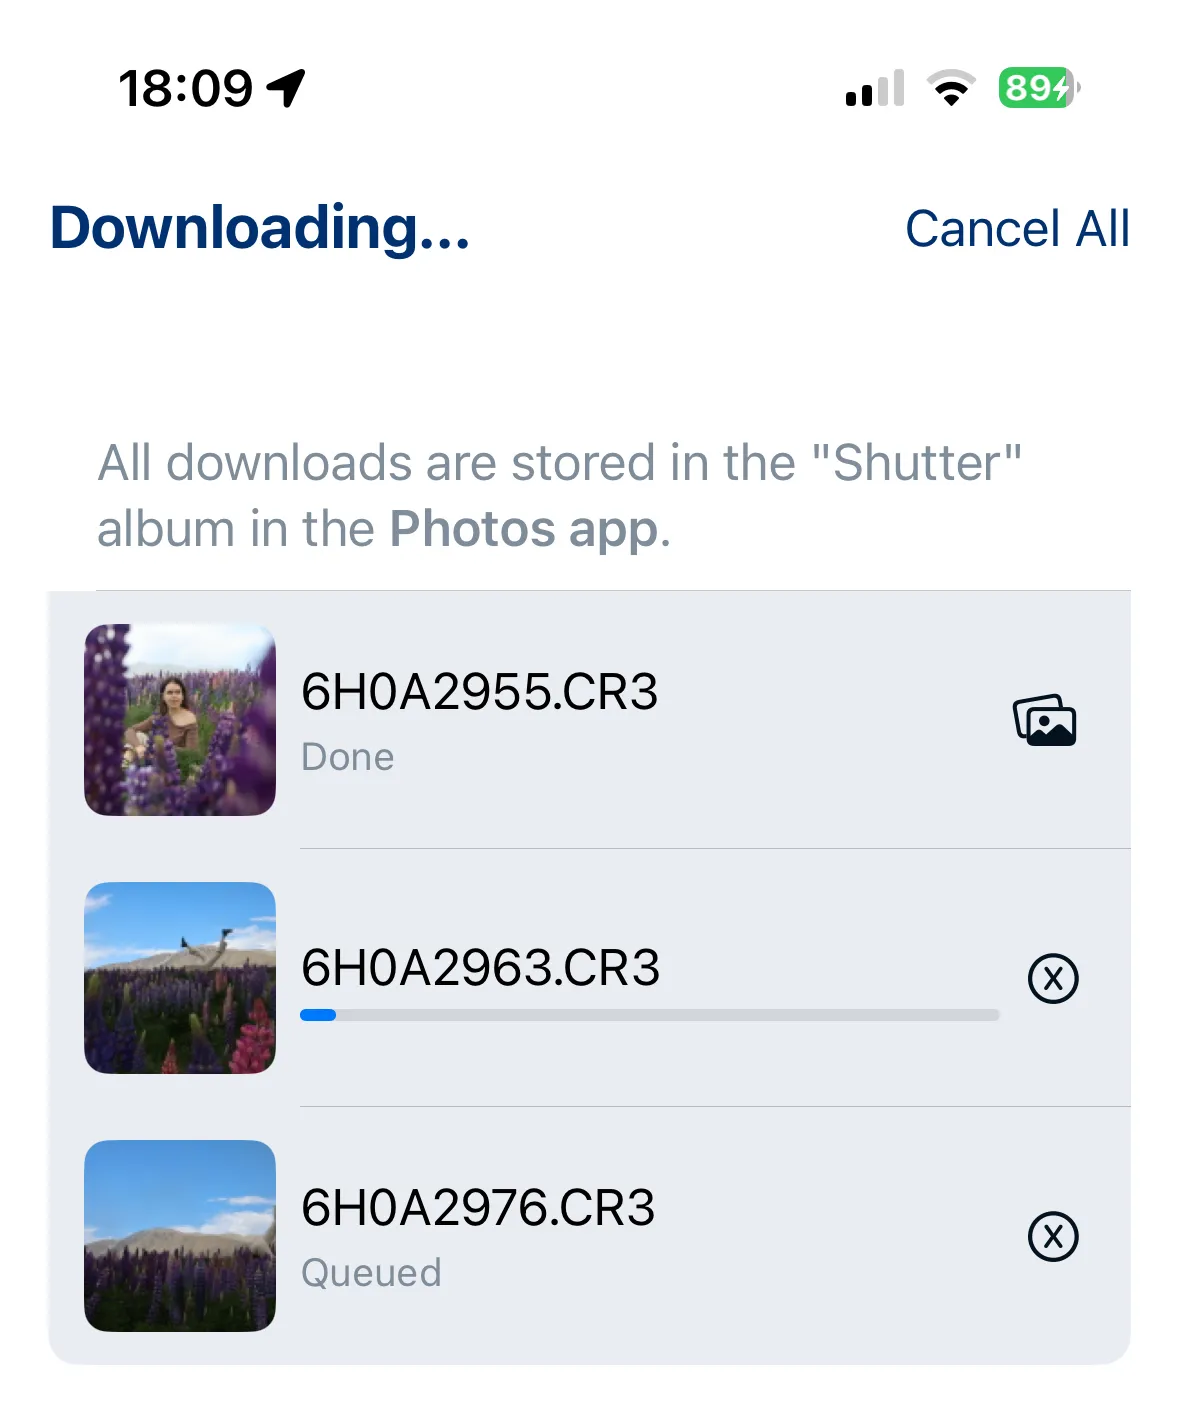
Once a photo is downloaded, you can see a full-resolution downloaded image by tapping a photos icon or a file icon (depending on download location) next to the downloaded file.